Disabling MacOS PowerBook Password Security, Illustrated
by Brendan Shanks
It’s a common problem: you boot up an old PowerBook, only to find that Password Security has been enabled on the hard drive!
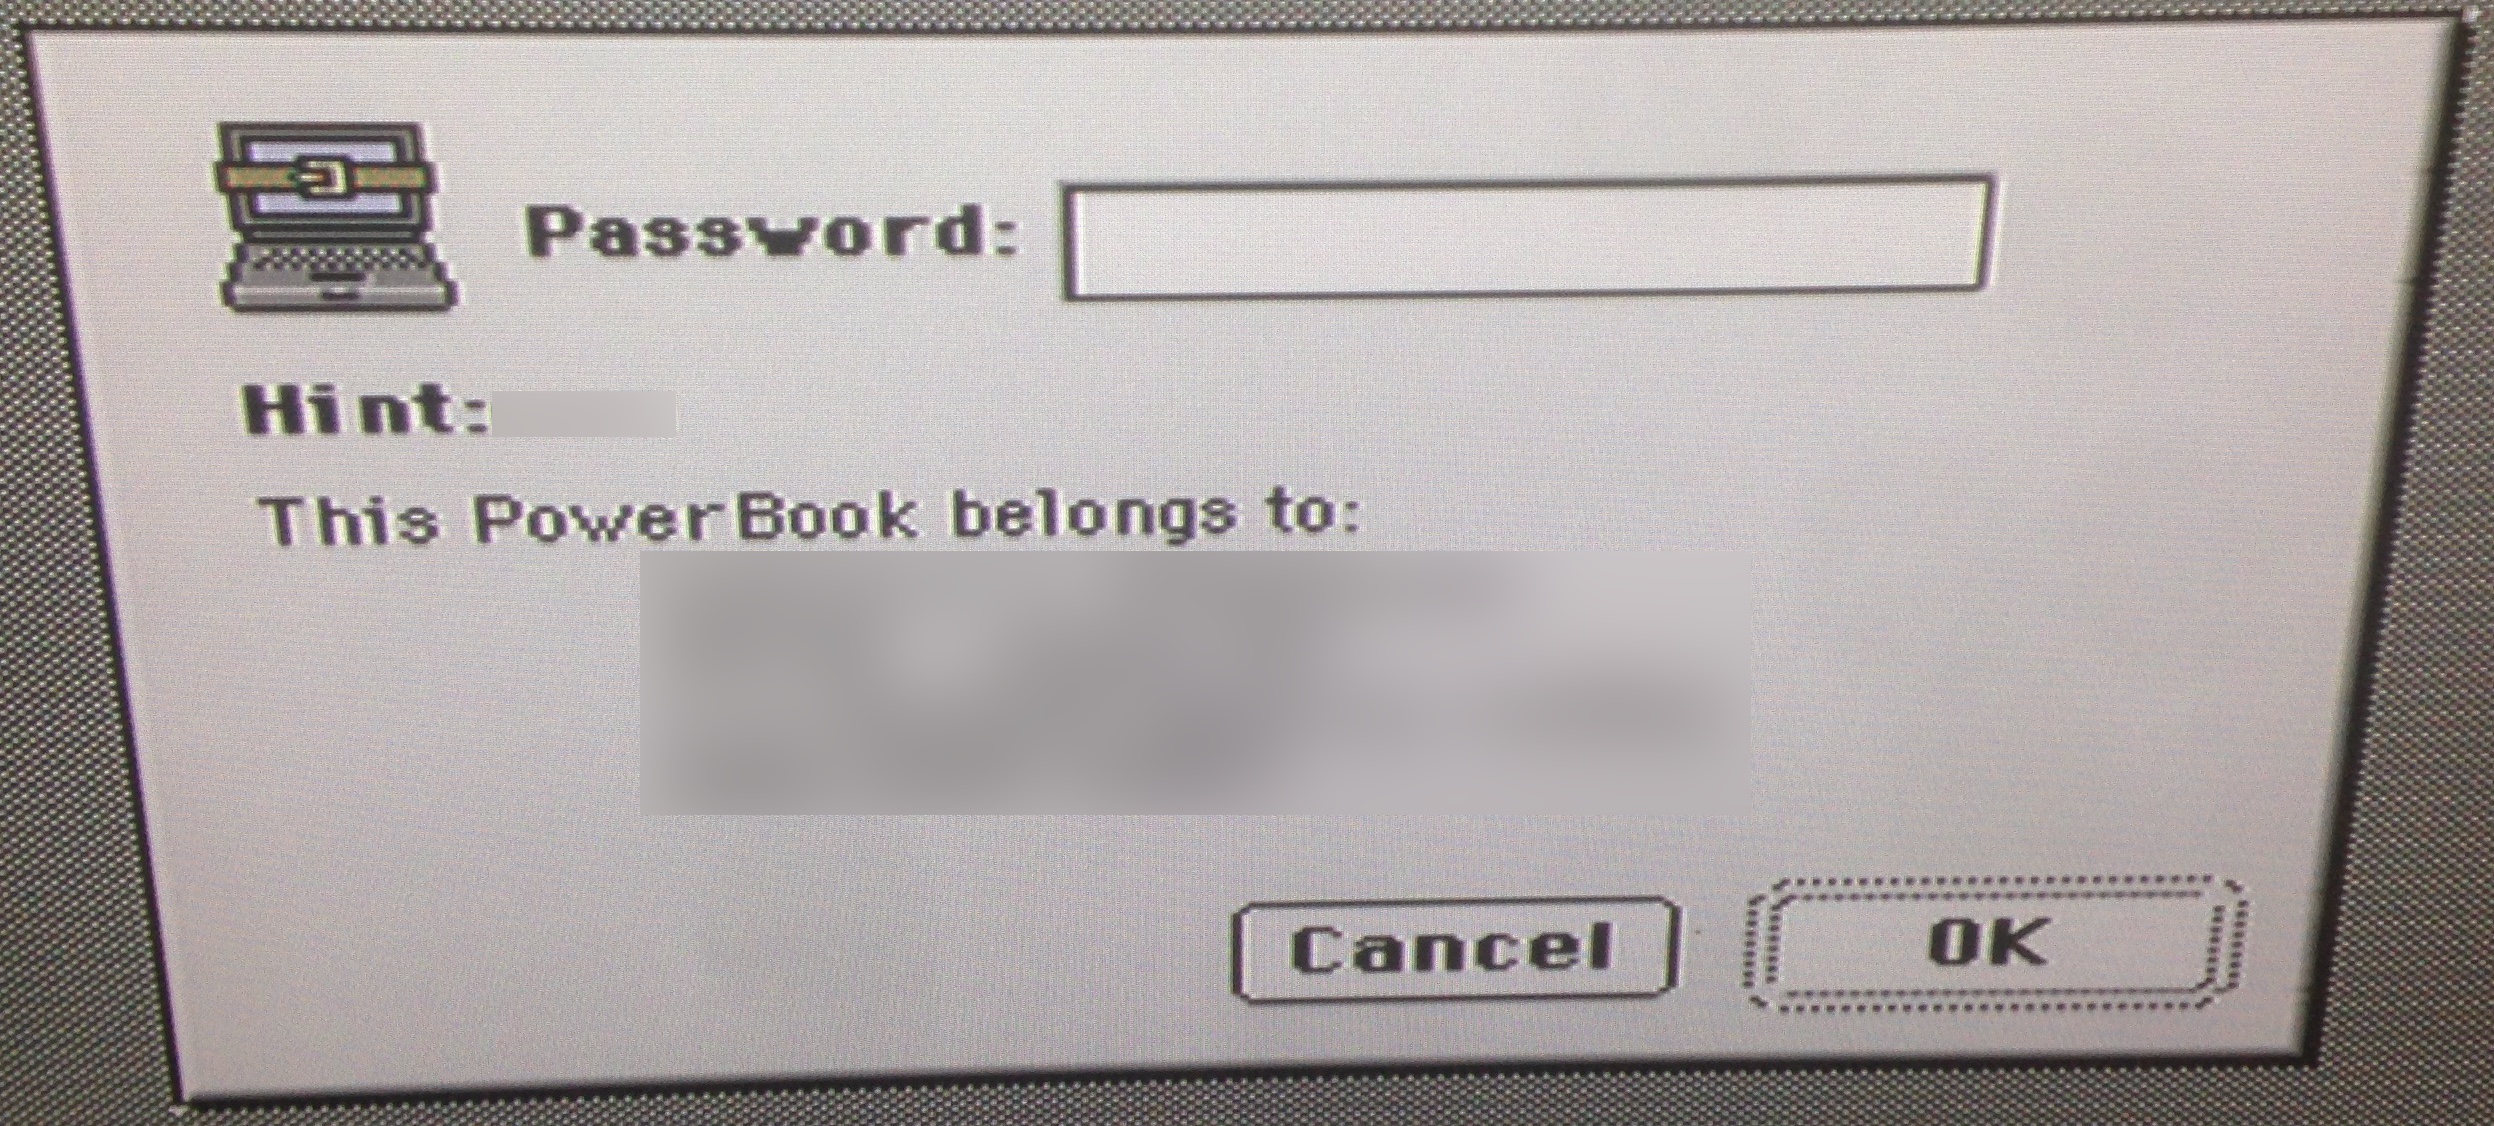
Apologies for the poor pictures, this PowerBook 2400 has a cracked screen and the only monitor I had handy was a 50” plasma
Luckily, PowerBook Password Security is not encryption, or really much security at all. A Macintosh security group called mSec (archive.org) revealed how Password Security works, in a text that can still be found at SecureMac:
The Password Security Control Panel stores it’s settings in a file called “aaaaaaaaAPWD” in the root folder of the Hard Drive. This file is impossible to access under OS 8.5 due to the fact that it has the attribute of a disk. It can neither be moved, opened nor copied. It is, however, important to notice that this file contains a bit-flag indicating whether Password Security is turned on or off. It contains, furthermore, an encrypted version of the password.
Using an emergency startup disk (or CD) and Norton Disk Editor anyone can turn off the Password Security Control Panel and even change the password. If the PowerBook is booted up using an emergency startup disk the password dialog will appear when the Hard Drive is being mounted. If the user cancels this operation the PowerBook will still be usable, although the Hard Drive will not mount, leaving all information on the Hard Drive unavailable. However, Norton Disk Editor has the ability to display and change data even on unmounted disks. Since the settings file, aaaaaaaaAPWD, can be accessed this way, anyone can toggle the “on/off” mode of the Control Panel. This can be achieved by changing the value of the byte at offset three in the data fork from 01 to 00. Since the encrypted password is stored at offset 4 in the data fork of the file even that can be changed.
In short: by booting off another disk and using Norton Disk Editor, you can turn off password security!
I booted my PowerBook off a CompactFlash card and PCMCIA adapter, and gathered a couple different versions of Norton Disk Editor to try. If your disk is formatted with HFS+, you need to use Norton Disk Editor+. I found it included with Norton Utilities 6.0 (readily available from Macintosh Garden). HFS disks can use either the original NDE or NDE+, but I recommend NDE+ since it can handle both filesystems.
Once you’ve launched an appropriate version of Norton Disk Editor, pick the “secured” disk. With the disk open, choose Edit->Find….
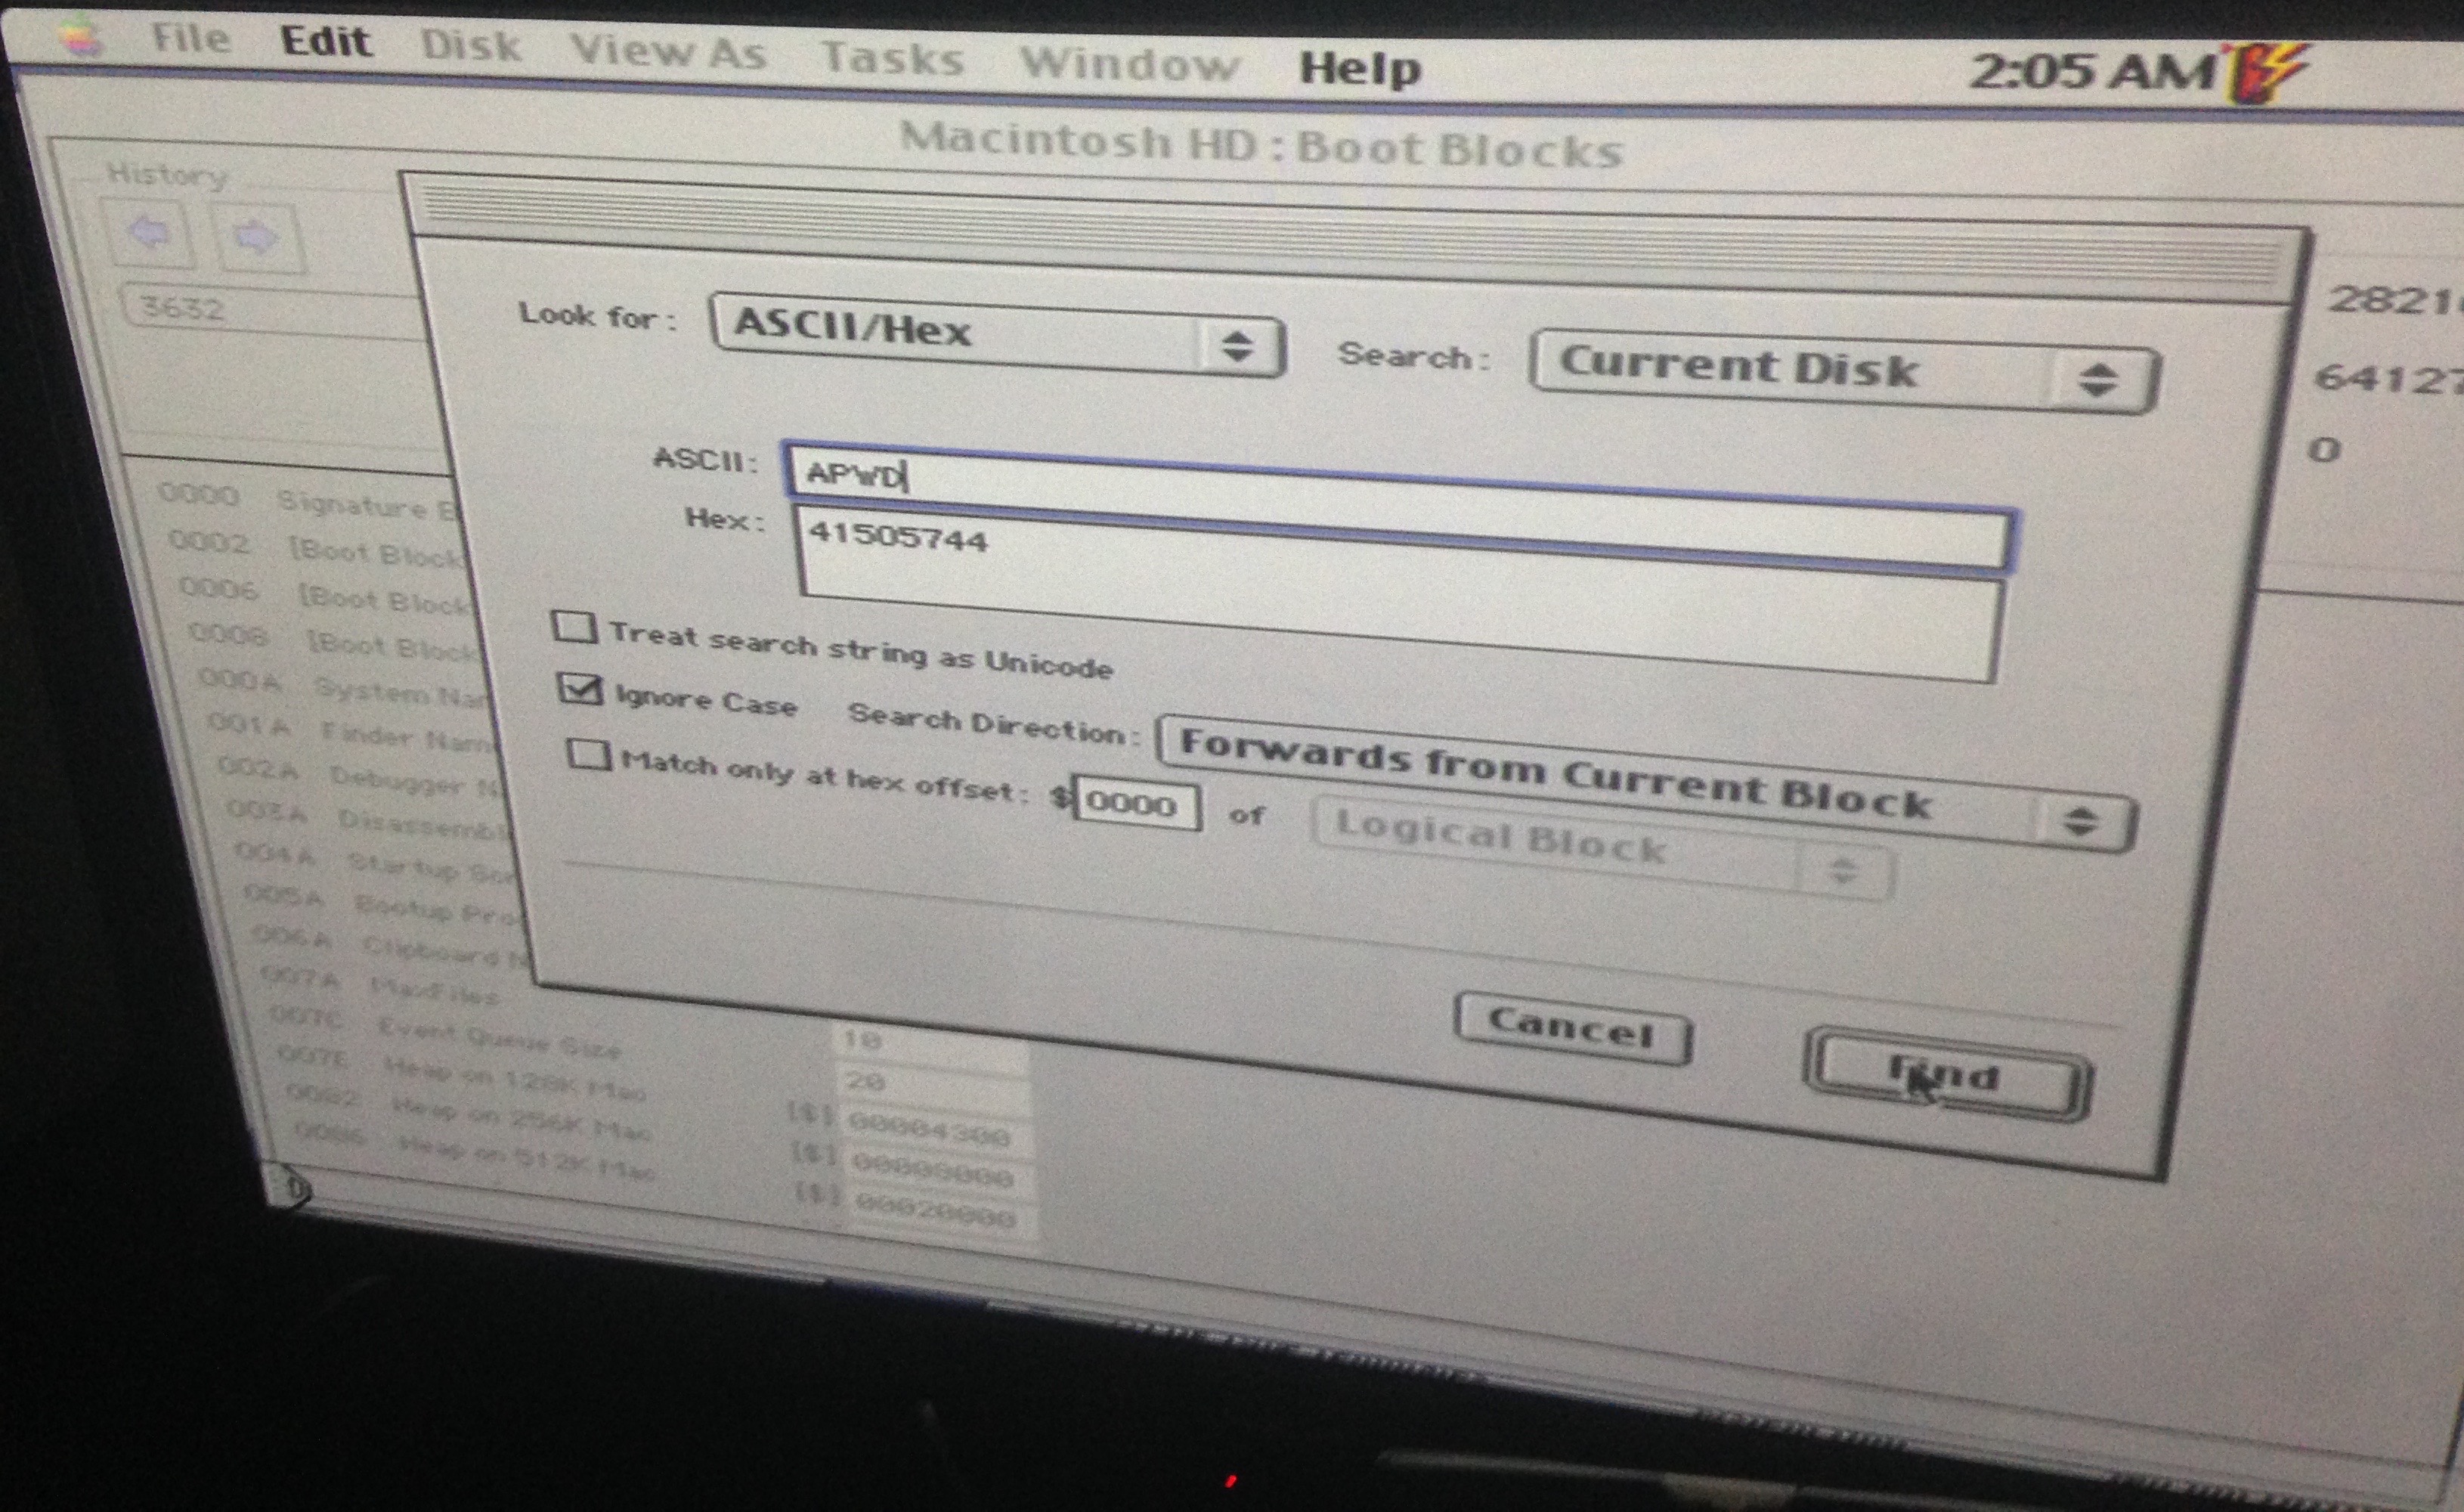
We are looking for the hidden “aaaaaaaaAPWD” file which contains the Password Security settings. Set the parameters as shown in the picture above and click Find. With any luck, this will be the result:
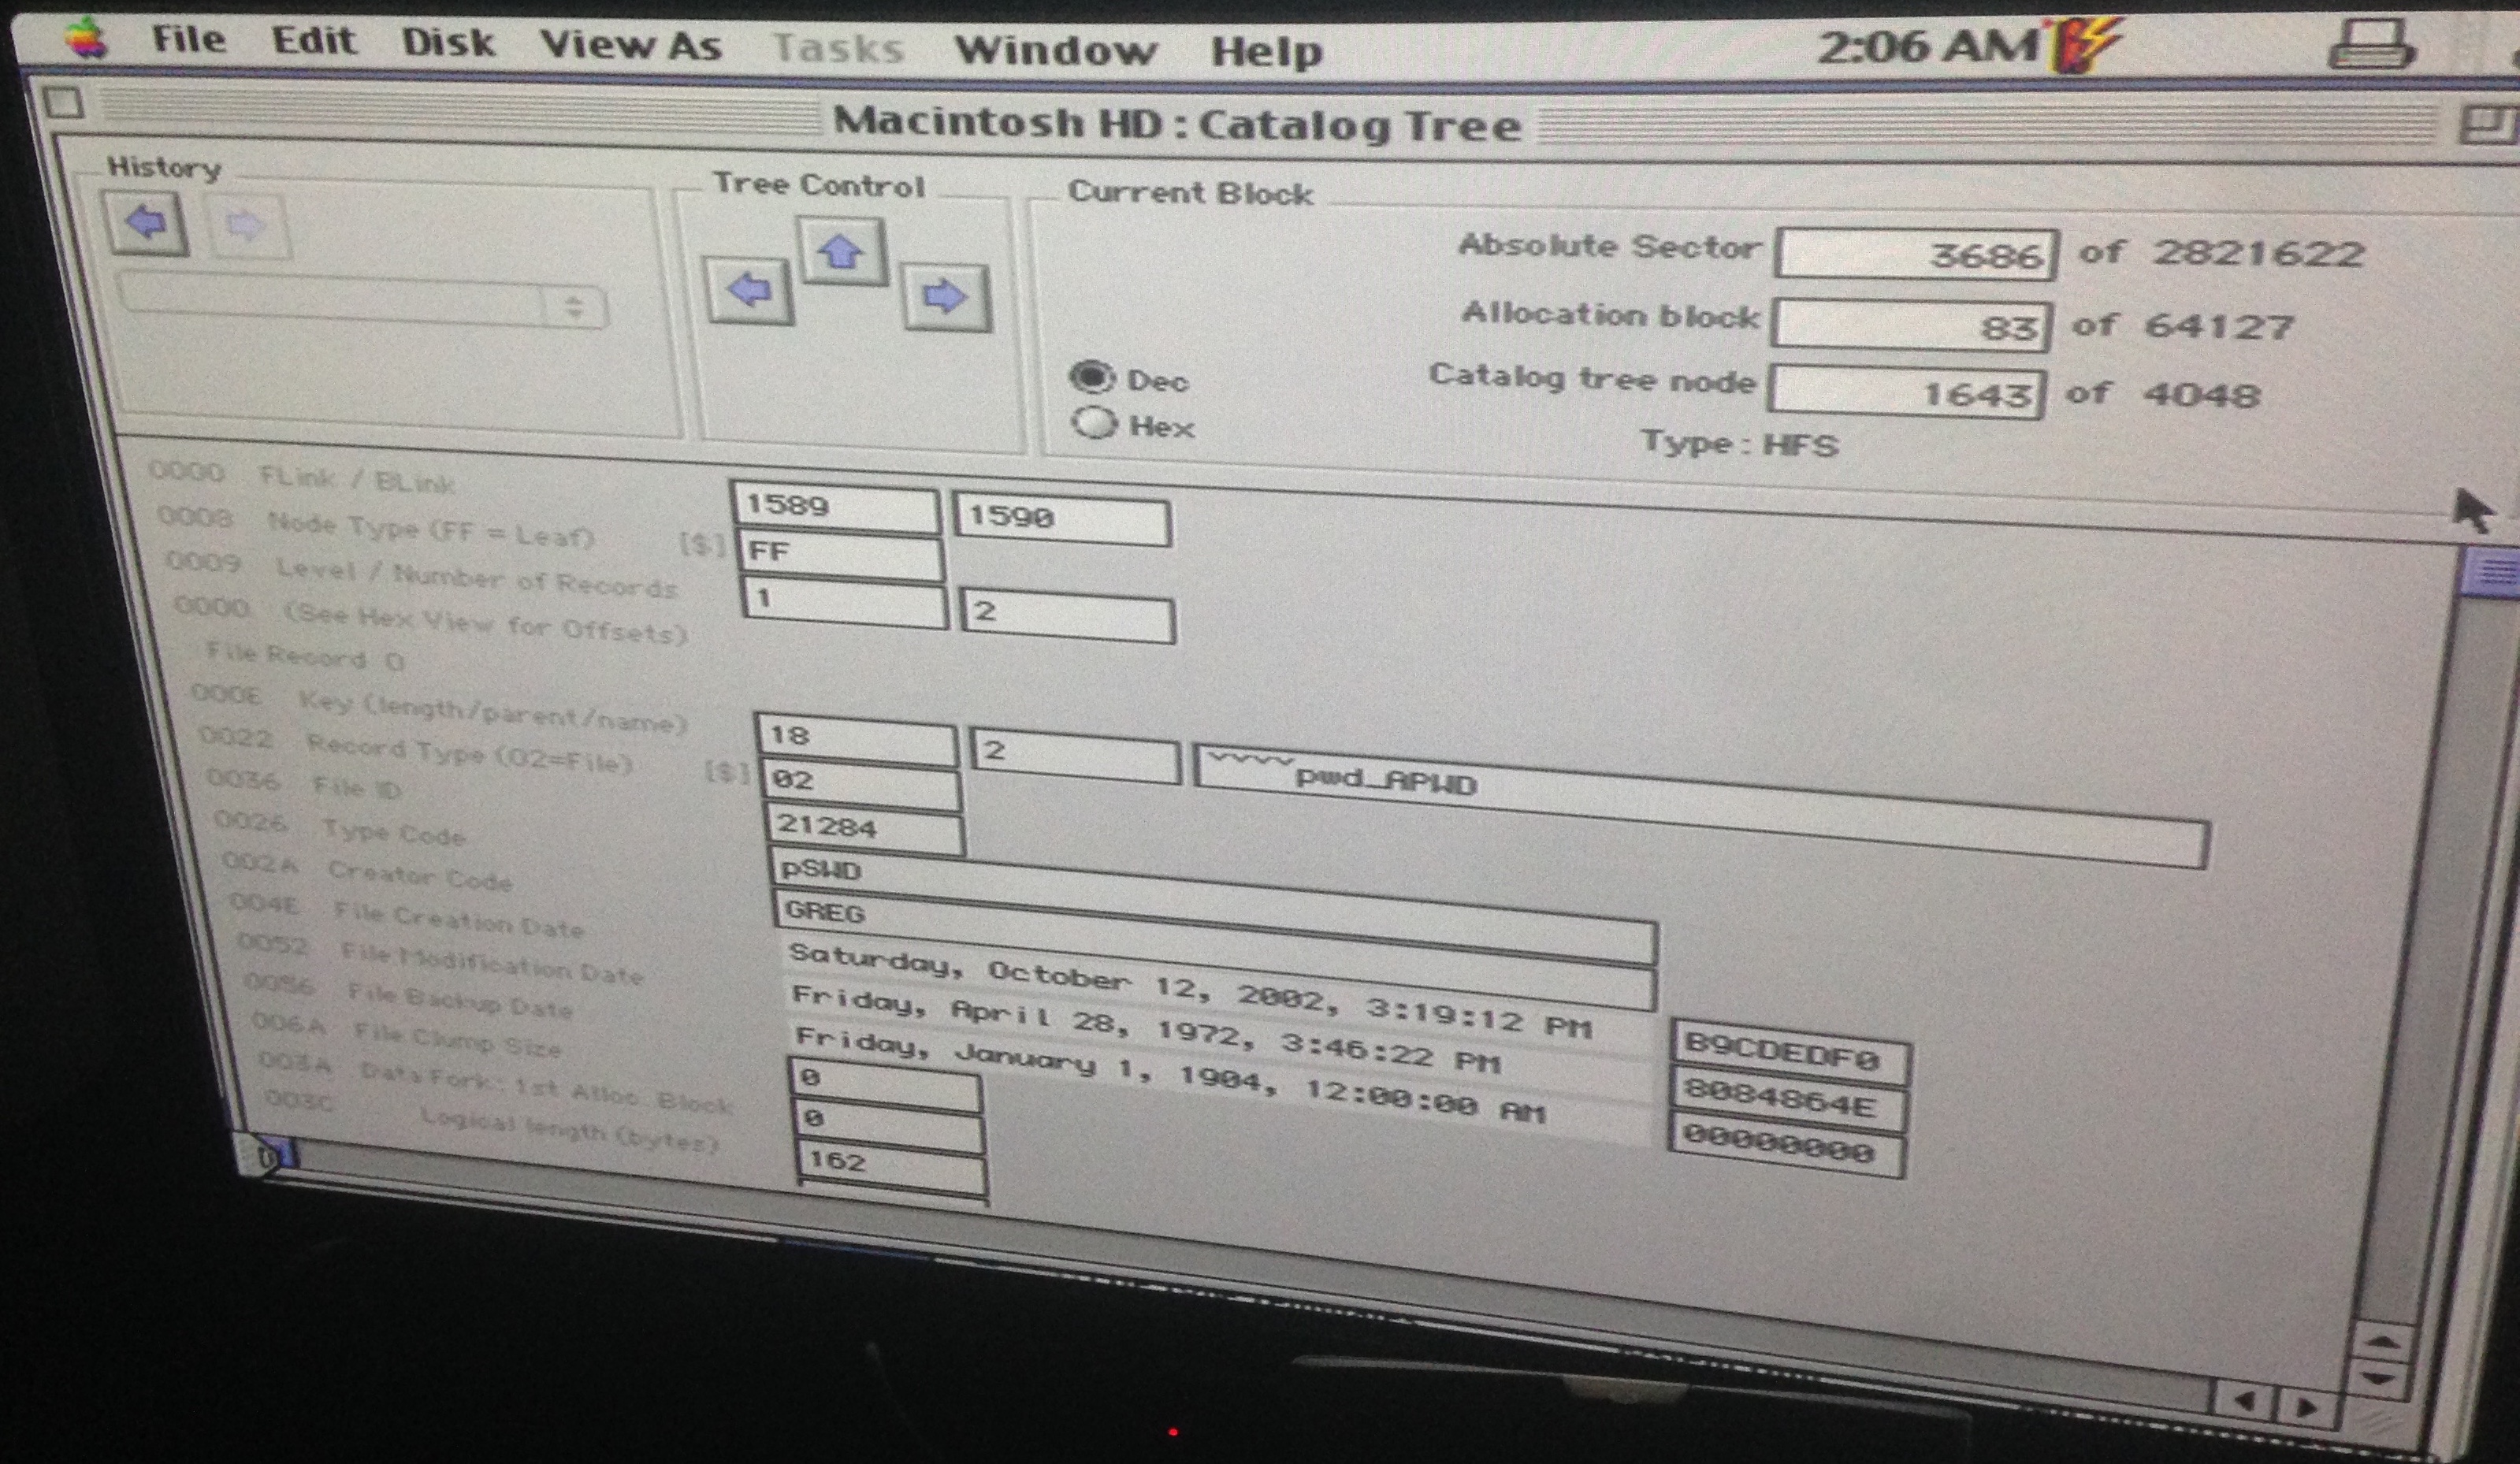
This is the catalog tree node (think inode in UNIX parlance) for the “aaaaaaaaAPWD” file. Note the ‘pwd_APWD’ in the name and the ‘pSWD’ type code. The information needed to edit the file’s data is out-of-view, scroll down and the window should look like this:
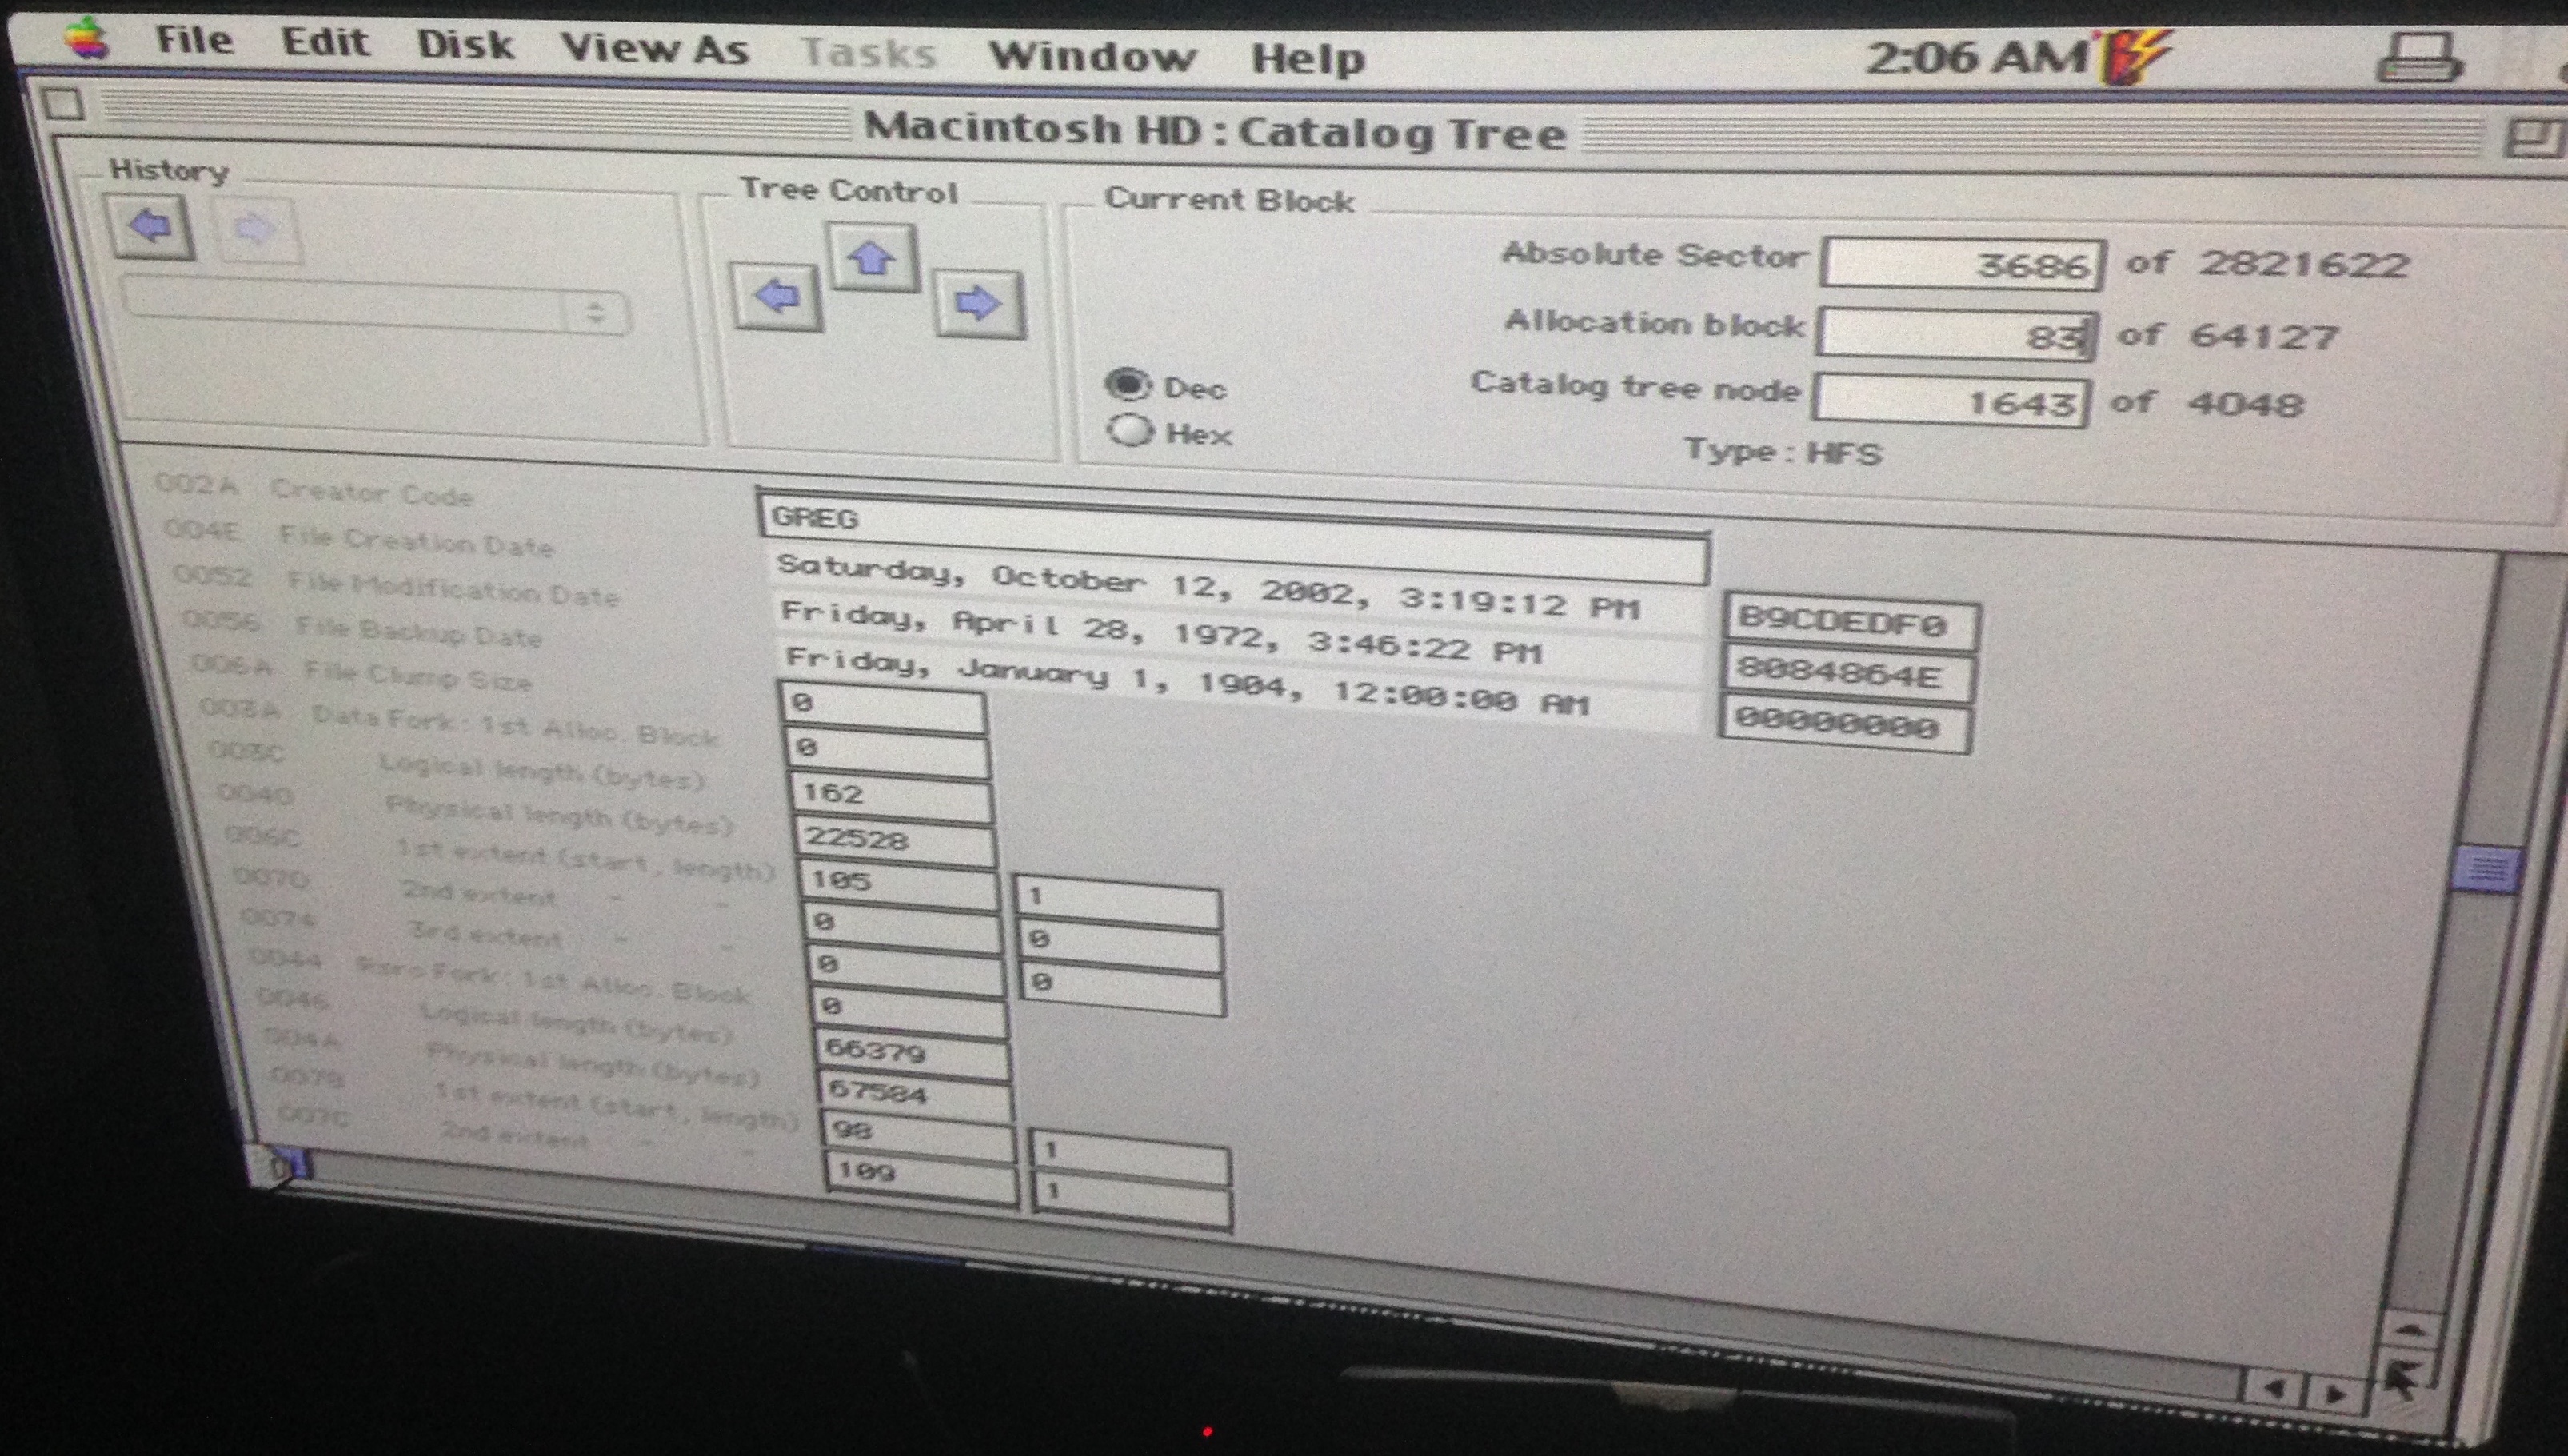
The information needed is the 1st extent of the data fork, ‘105’ in this case. Enter this number into the “Allocation block” field at the top right of the window, and press return. The window should change to look like this:
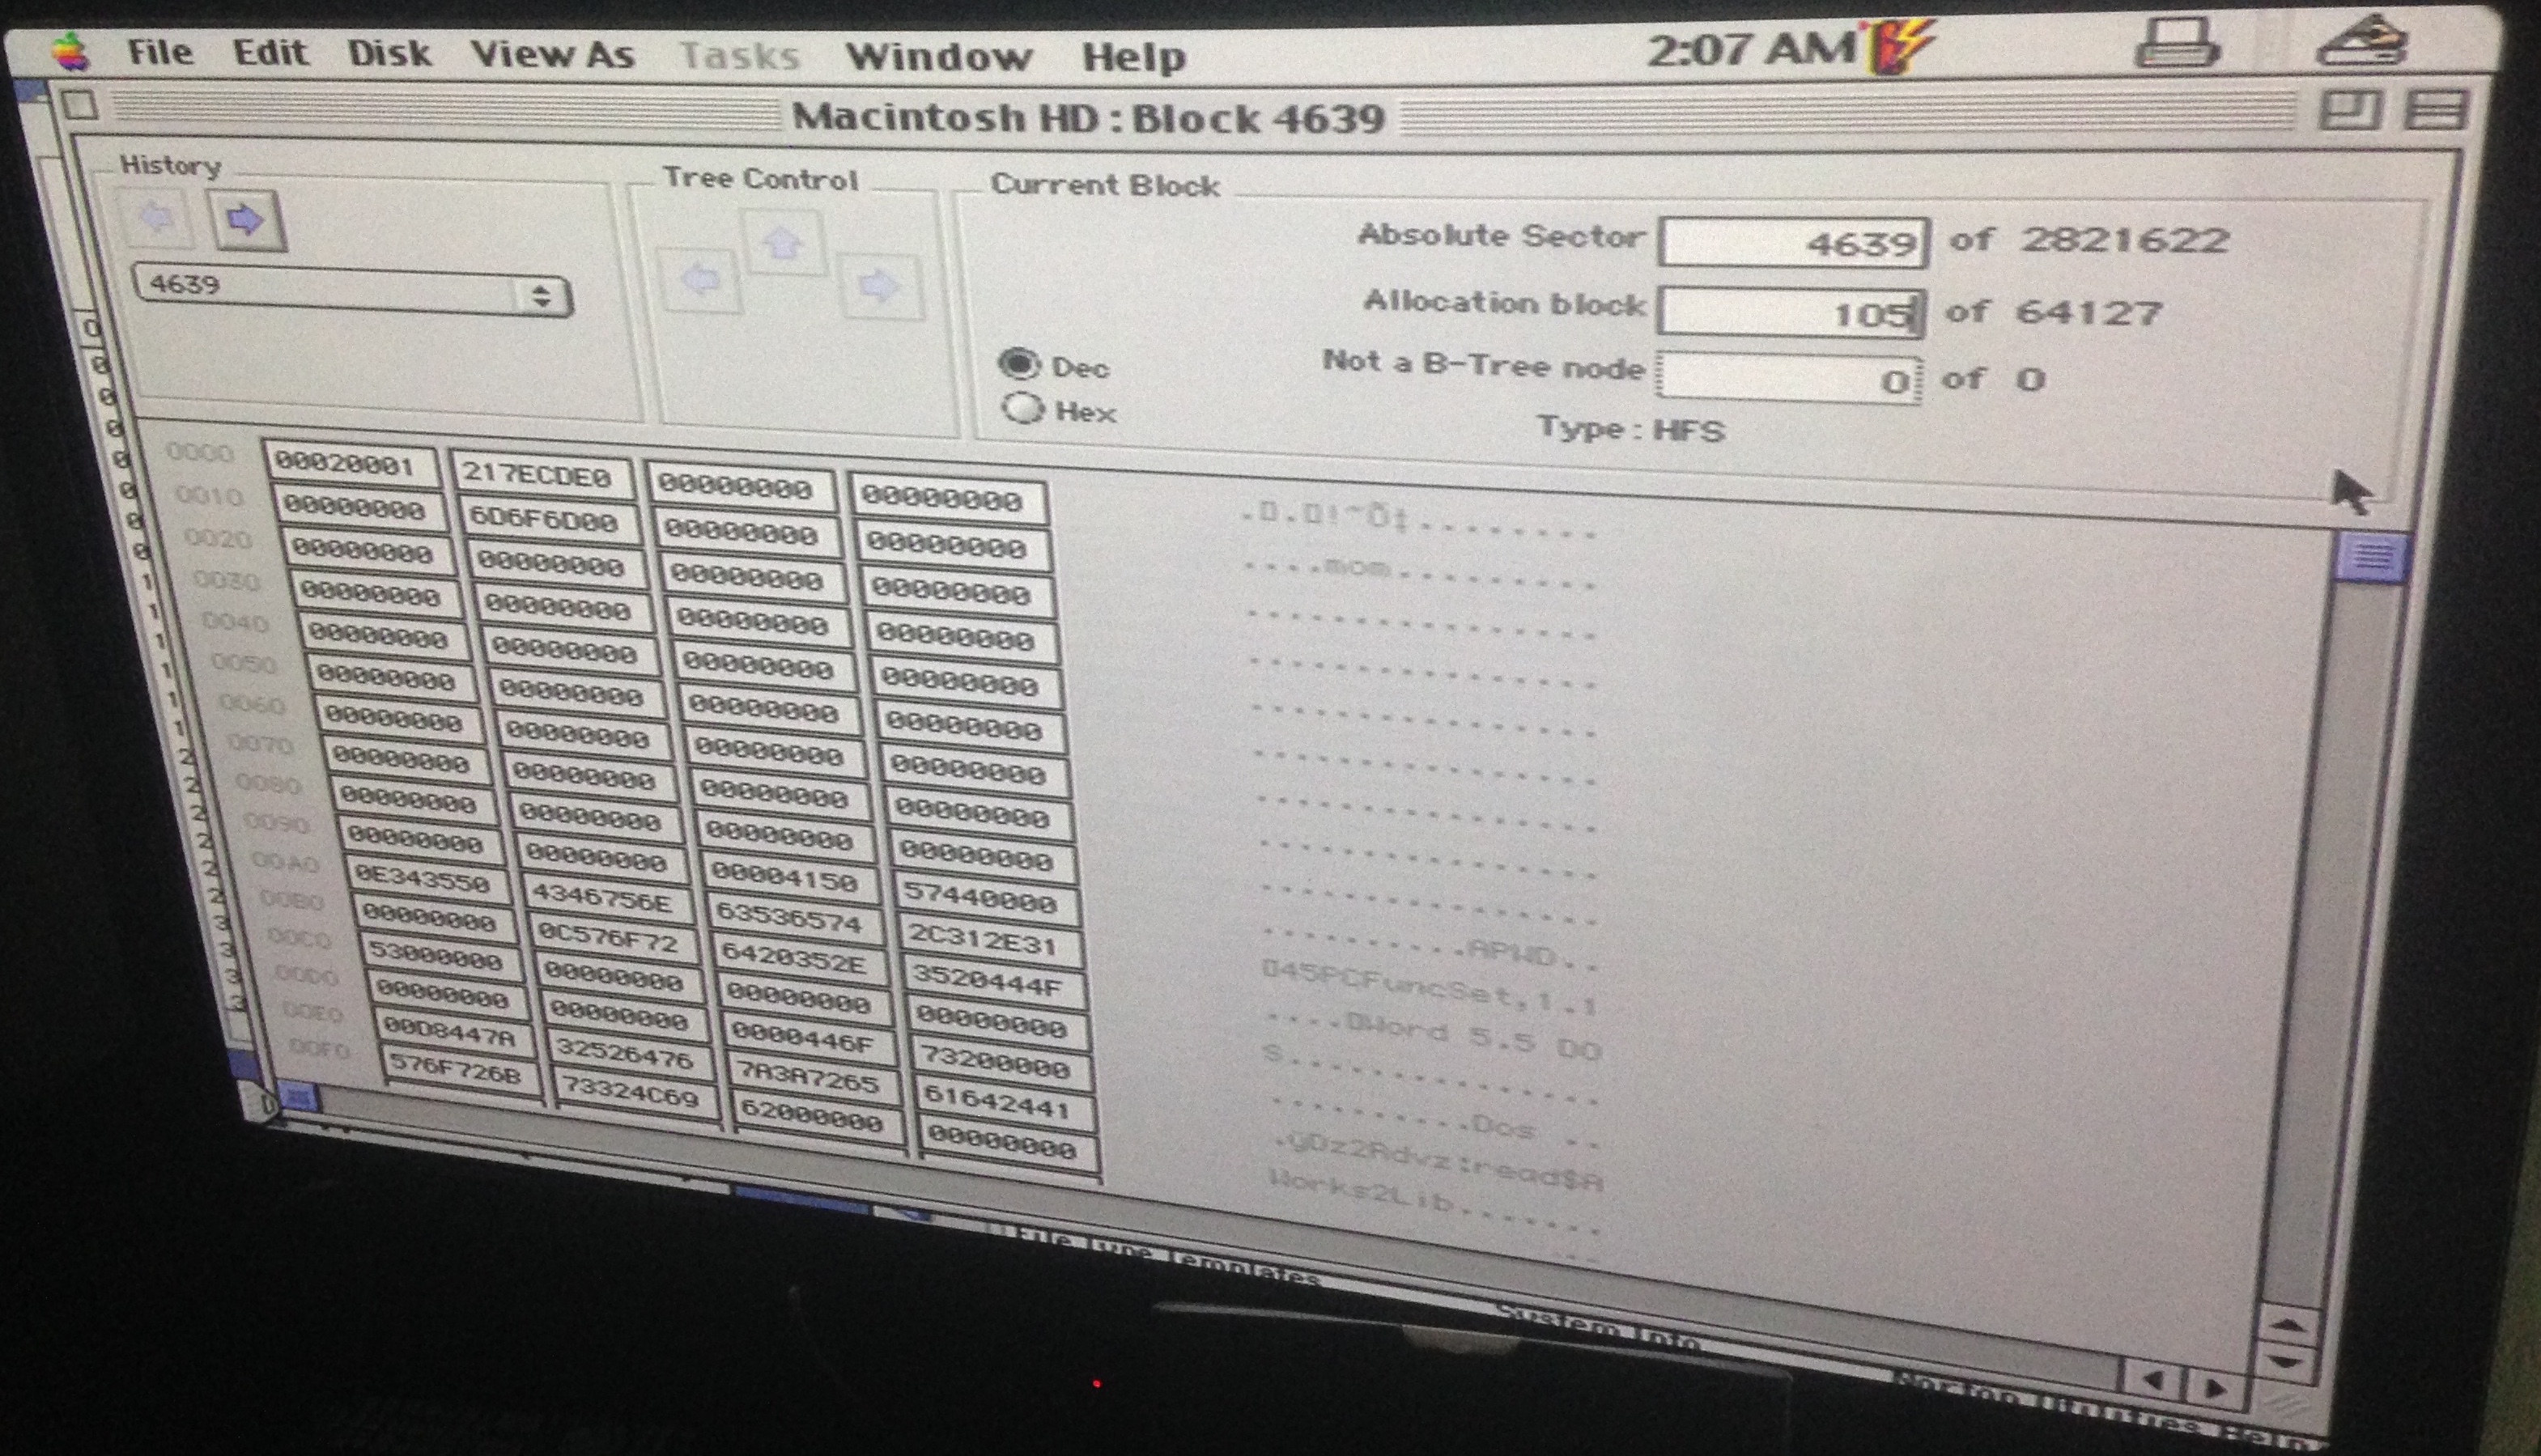
You are looking at the data fork contents of the “aaaaaaaaAPWD” file! The mSec text says that the byte at offset 3 controls whether Password Security is enabled: ‘01’ for enabled, ‘00’ for disabled. The next picture shows this byte highlighted (remember, offset 3 = 4th byte).
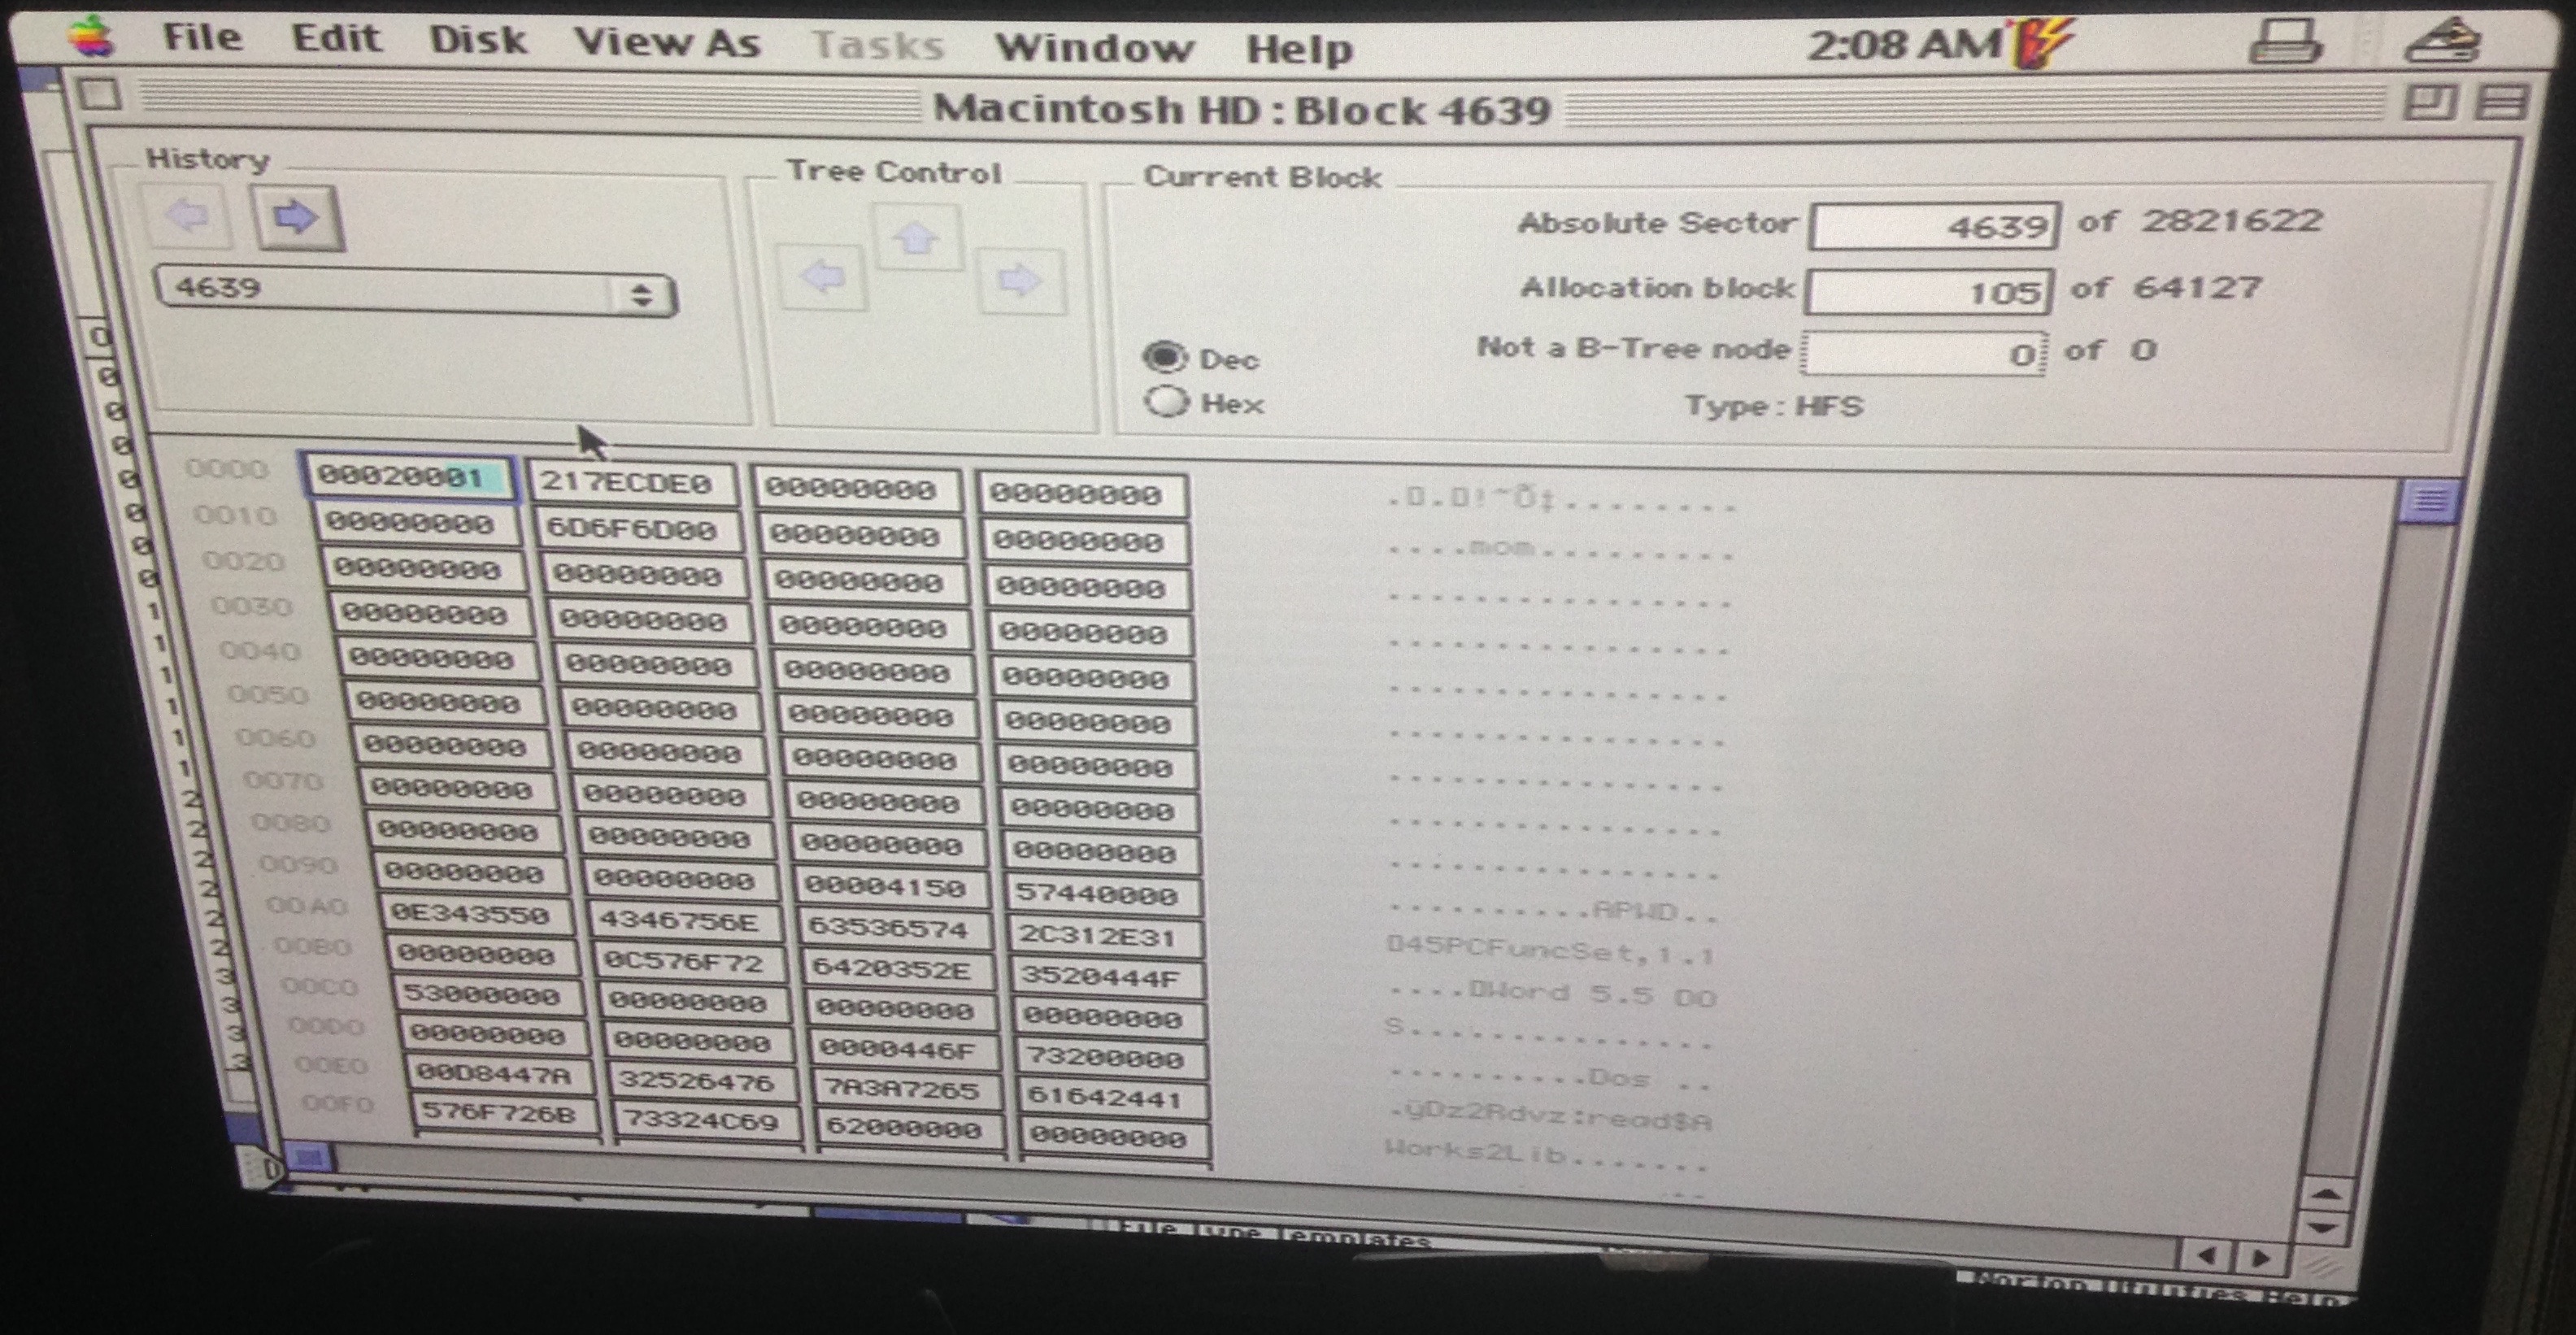
Change this byte to ‘00’, quit NDE, and your PowerBook should boot without any password prompt!
With great power comes great responsibility: please be careful and respect the privacy and data of your PowerBook’s previous users
Subscribe via RSS
