Fixing AMP OVERHEAT error on the Pioneer VSX 1020
by Brendan Shanks
I originally posted this on the AVSForum VSX-1020 thread on 4/4/2013
I fixed the “AMP OVERHEAT” error!!!
I’ve had the “AMP OVERHEAT” problem for years, starting about a year after I got my 1020. I found lots of things that seemed to help temporarily: plug it into a different wall socket, keep turning it on until it stayed on, but the problem would always recur eventually.
The root of the problem: the temperature sensor (“posistor” as it’s called in the service manual) went bad and presented a lower resistance, making the receiver think the amp heatsink was overheating. Luckily the posistor is easy to test and replace!
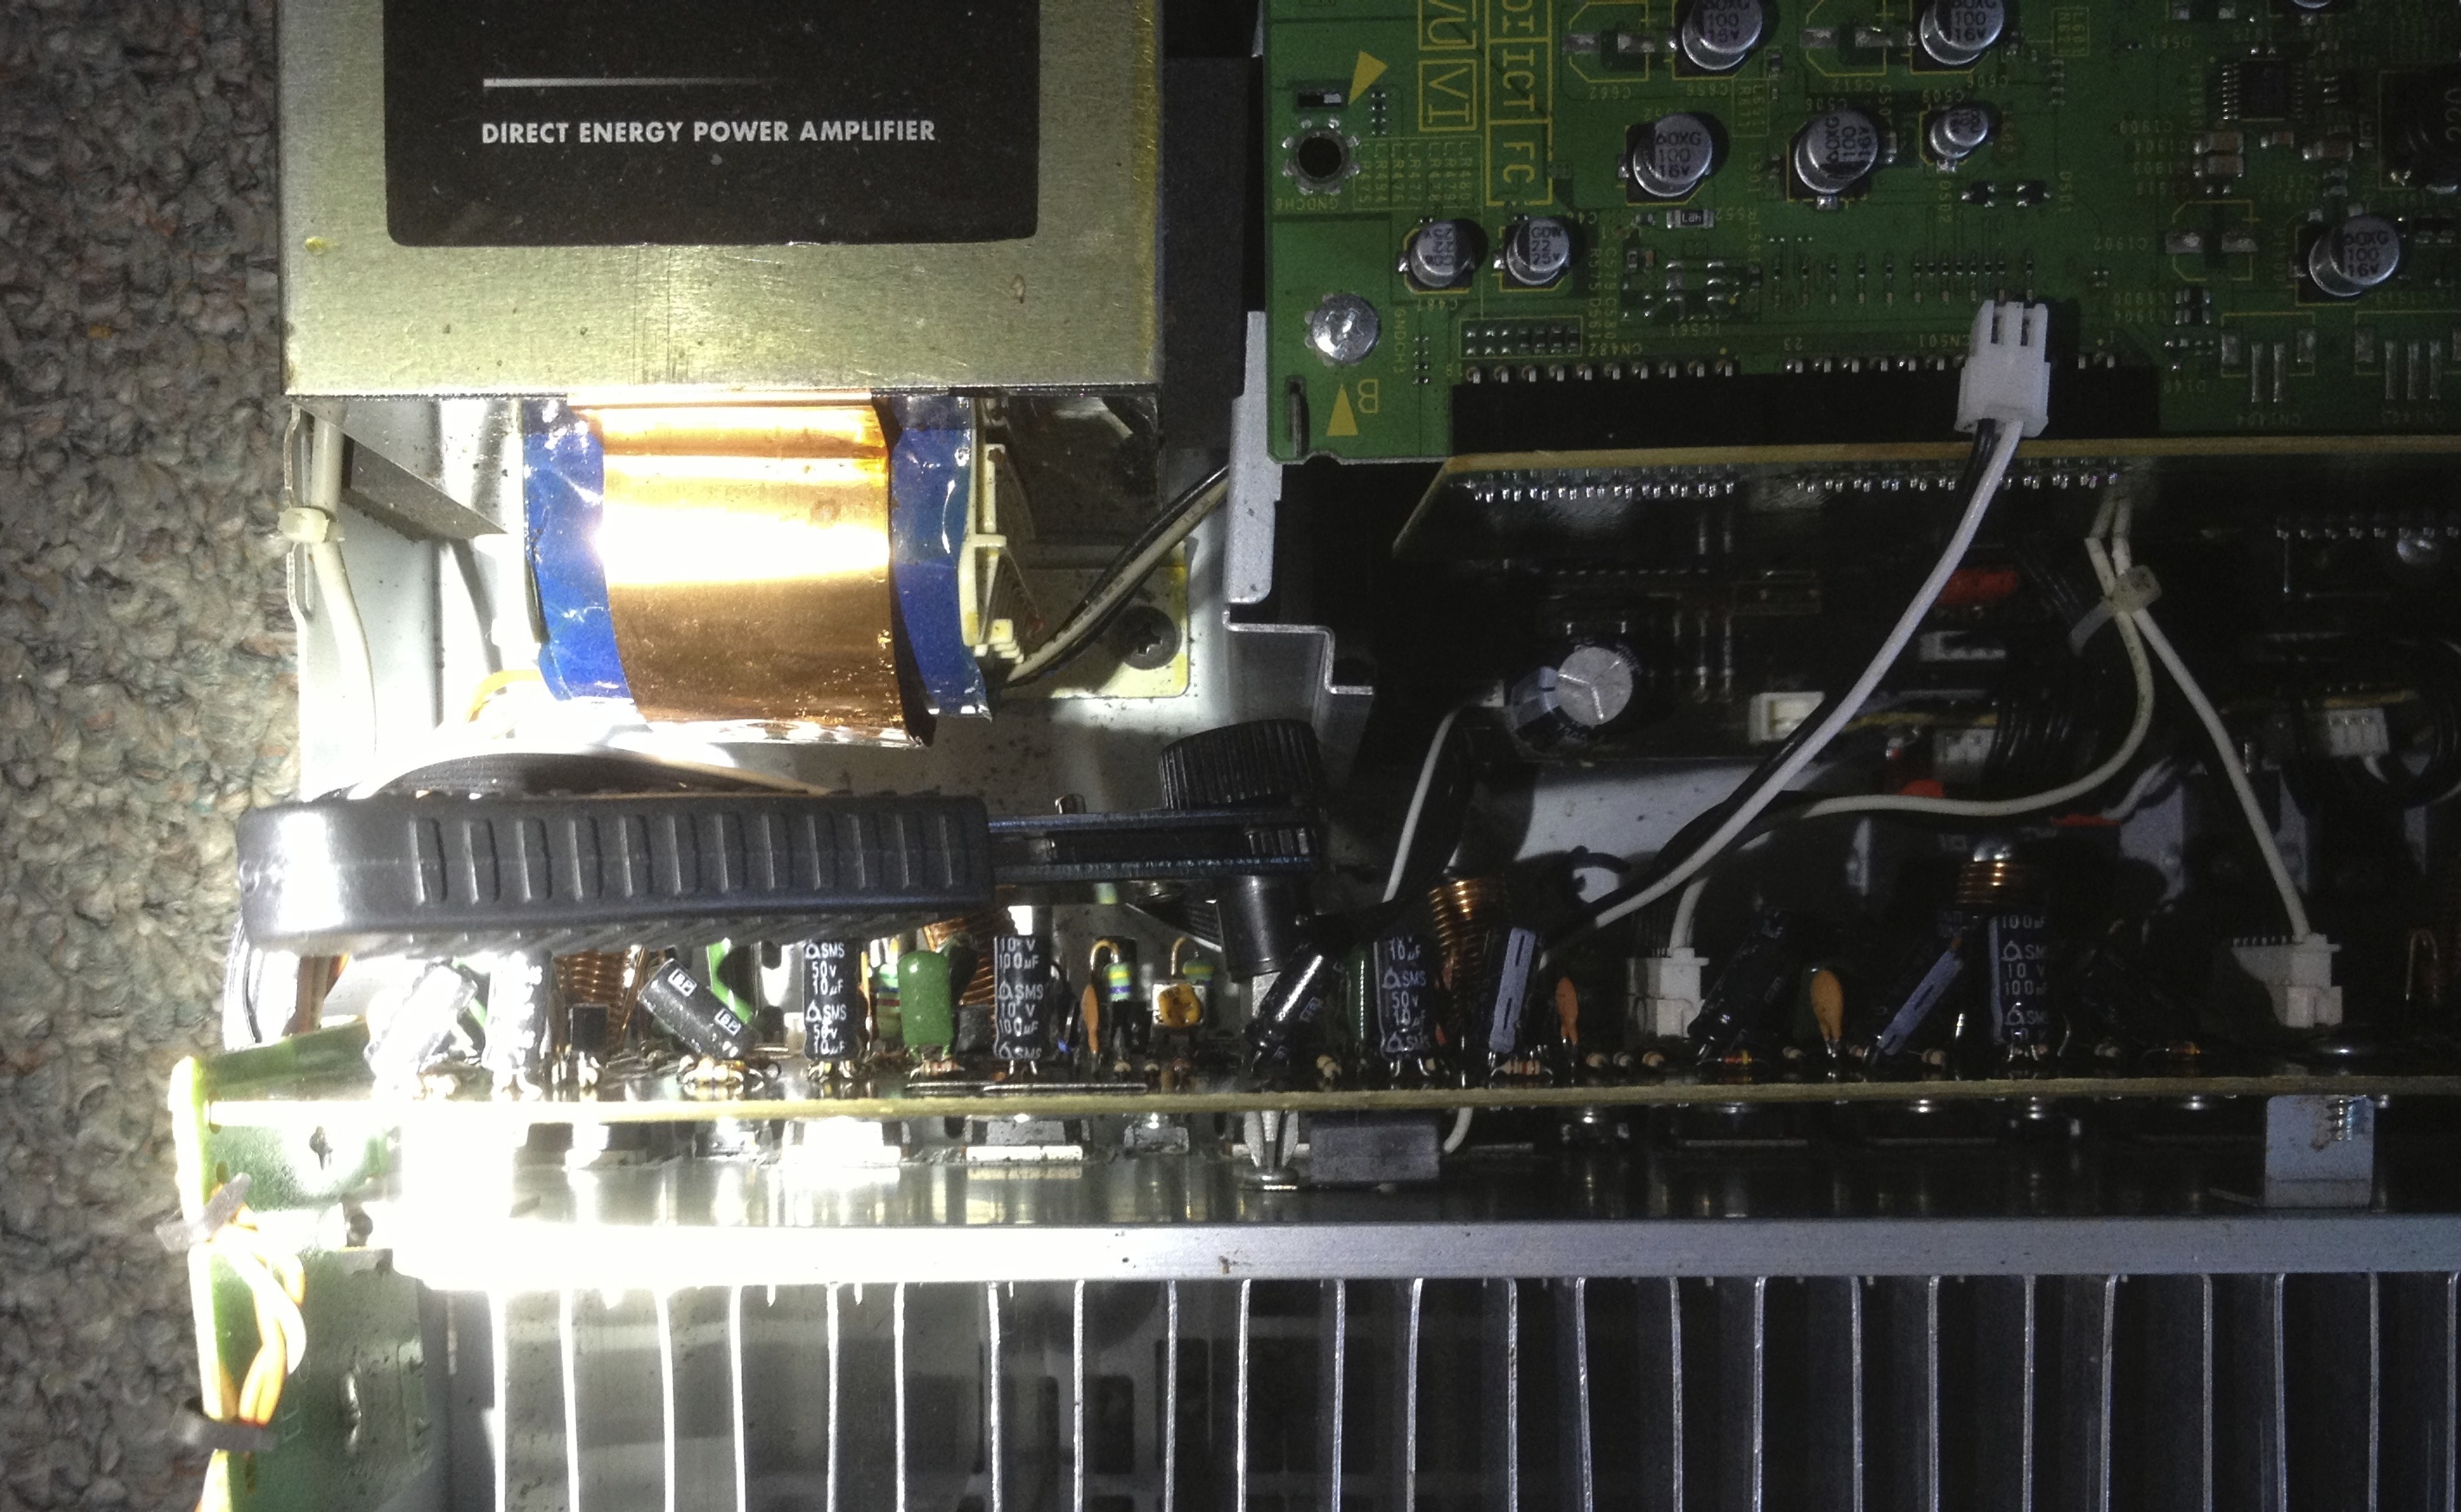
To get to the posistor: first remove the 10 screws (6 on sides, 4 on back) that hold the top cover on. The posistor itself is screwed to the amp heatsink, but the connector snakes through a hole in the amp board and then connects to the main/bottom board.
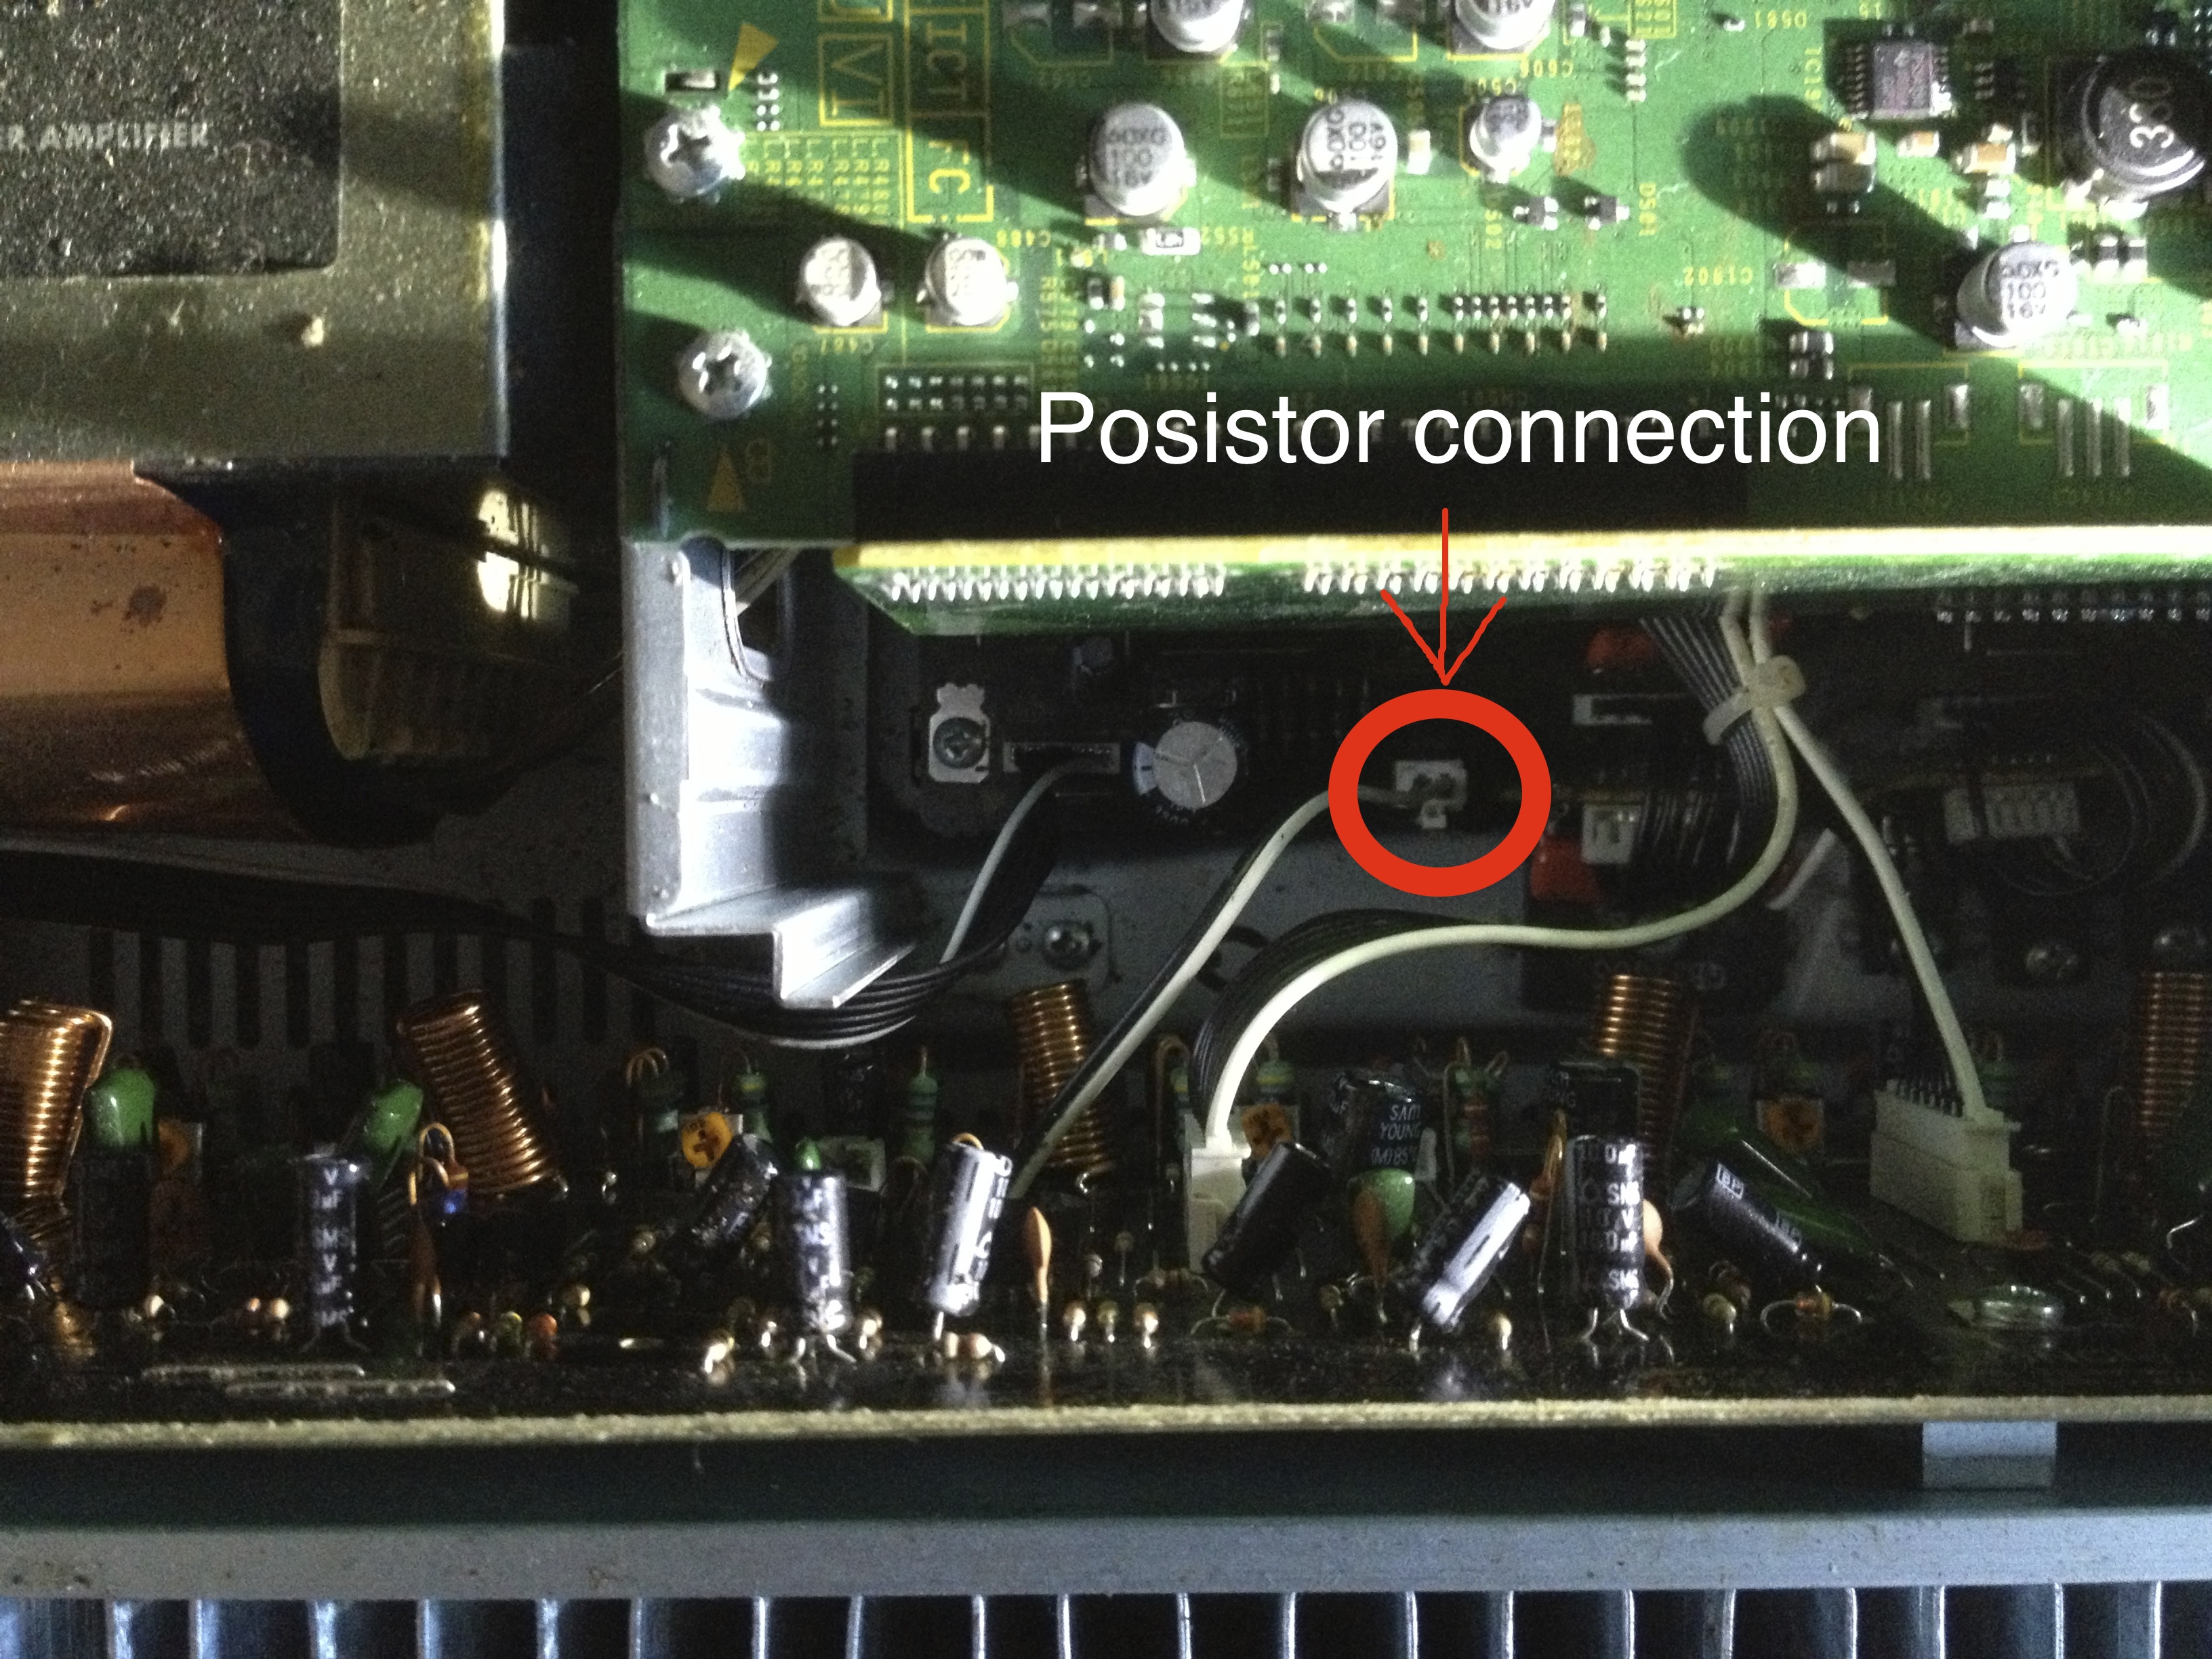
I was able to reach my hands in to push the end of the tab and pull up to disconnect it.
Warning: be careful around the amp board, it has lots of parts sticking up that could easily be broken off!
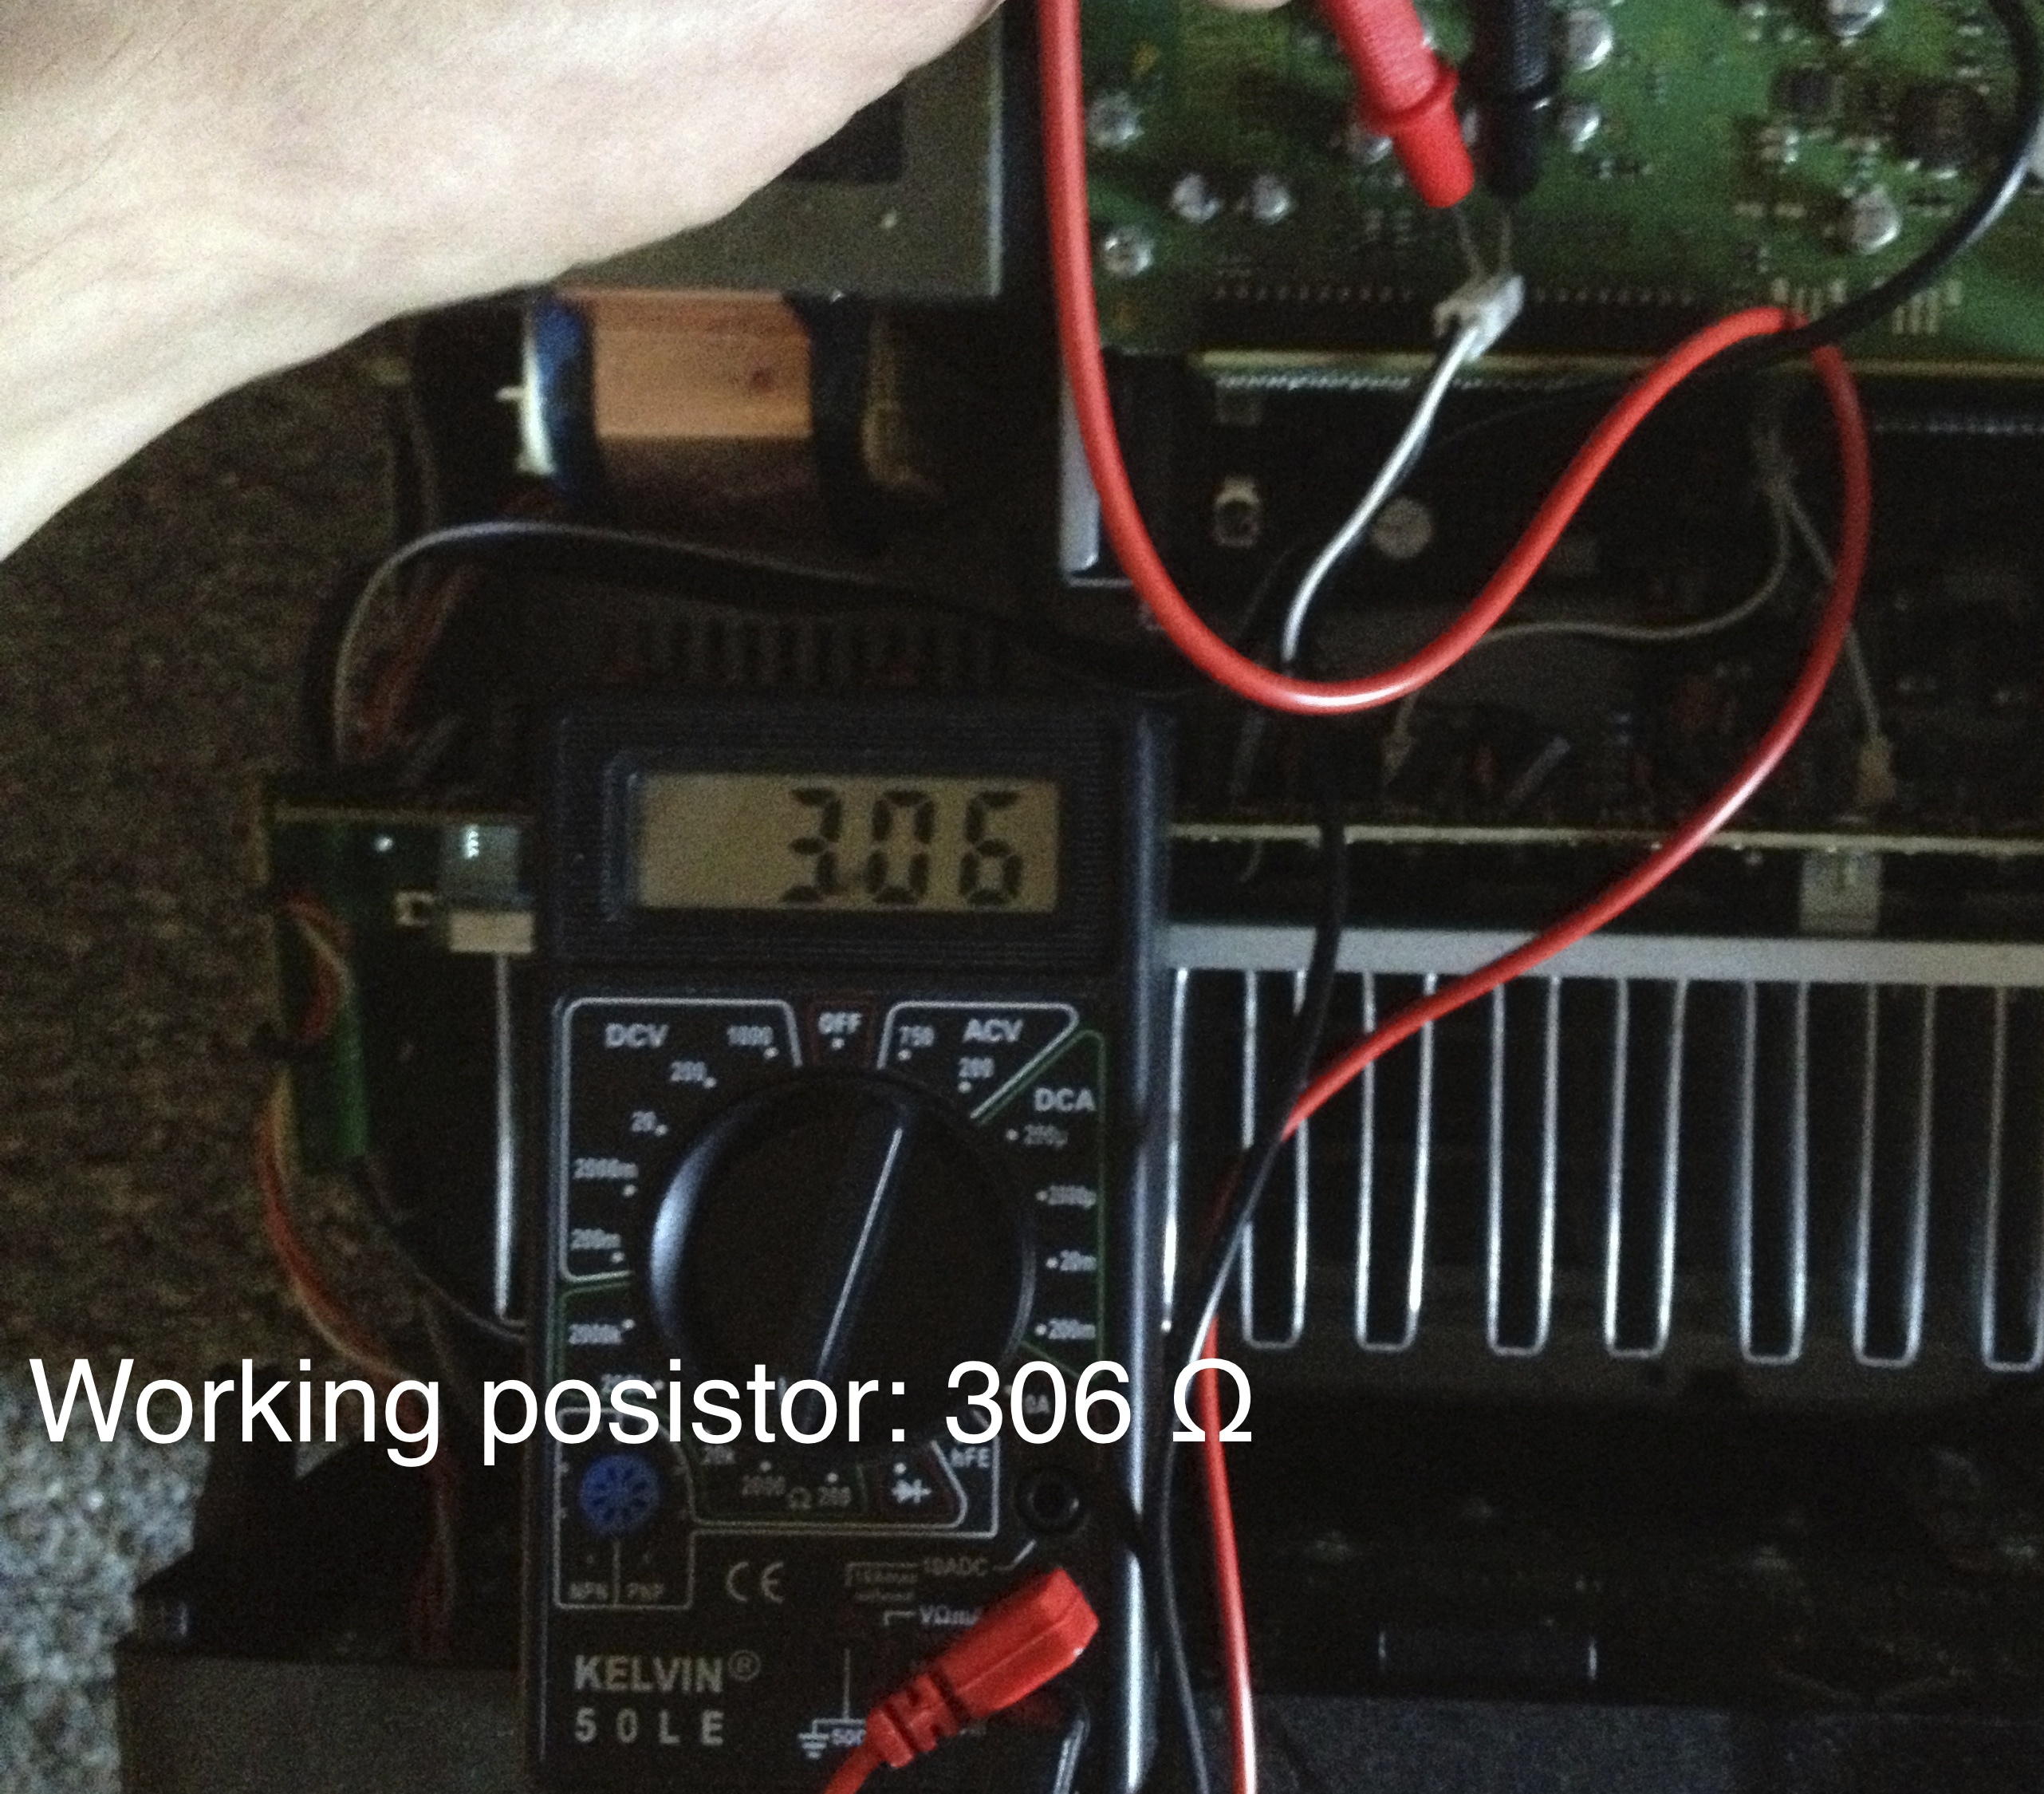
Using an ordinary multimeter, you can check the resistance of the posistor (to make sure it’s the problem)!
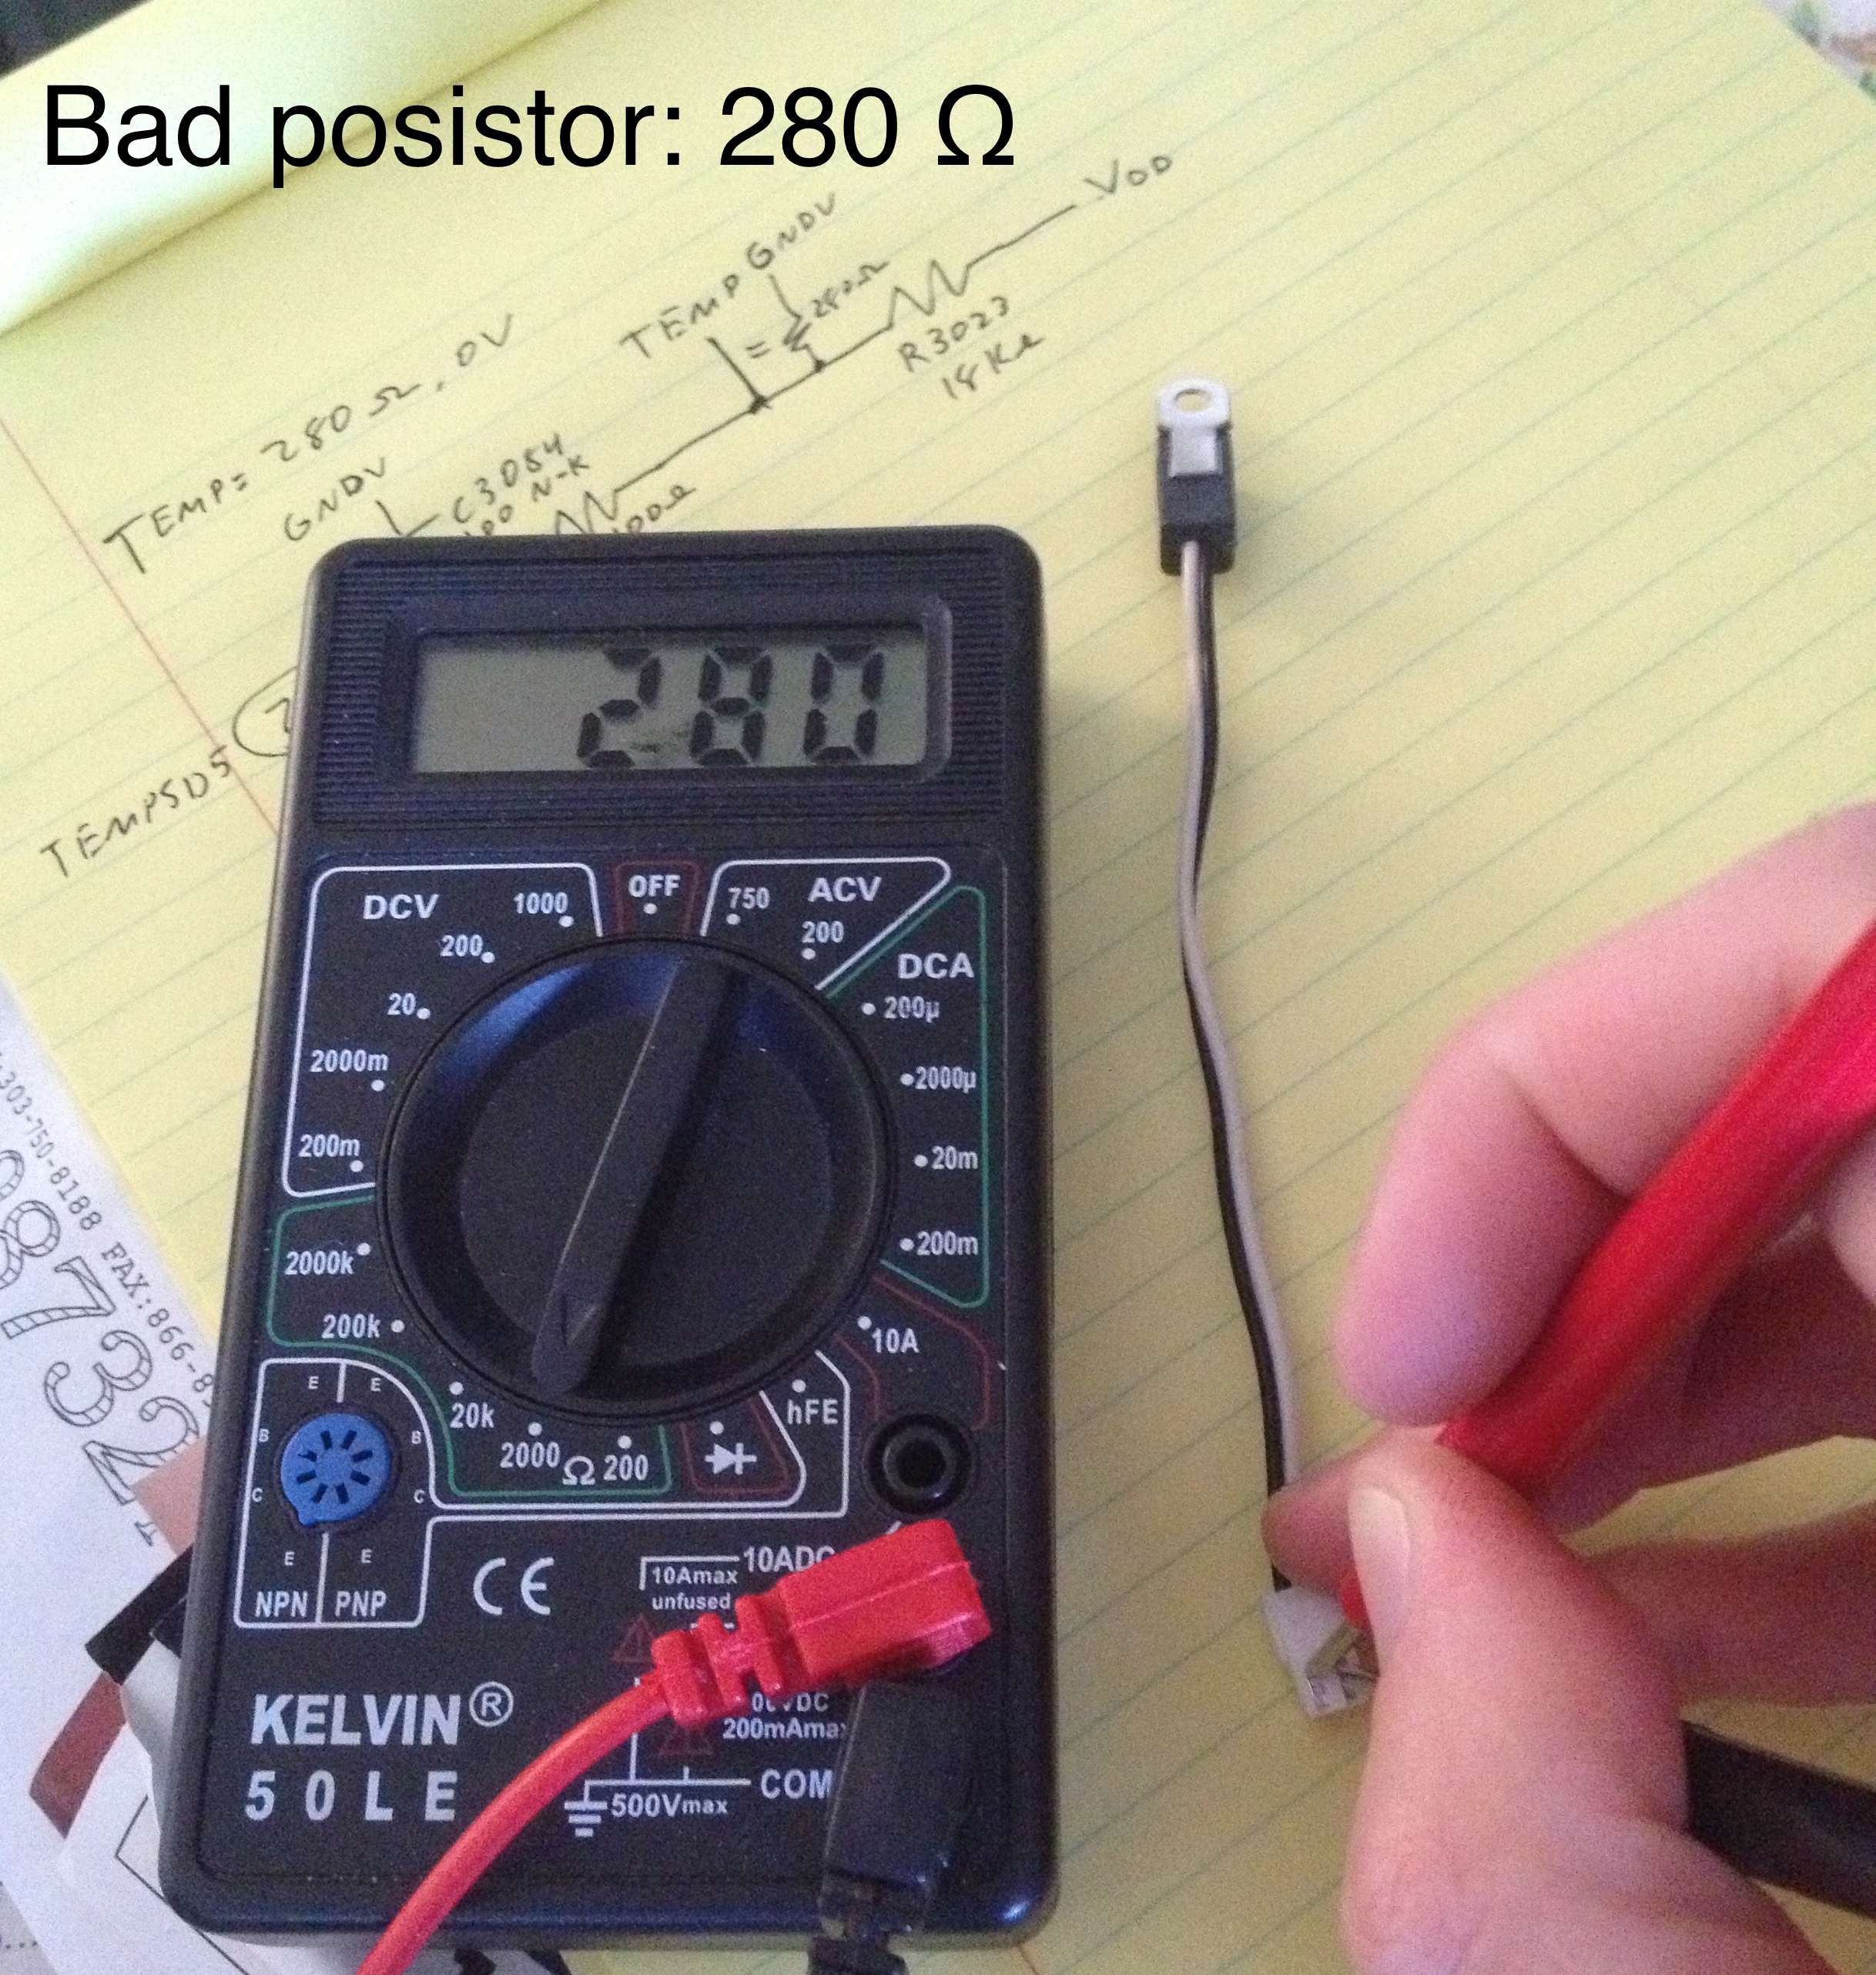
Now that you know your posistor is bad and causing the AMP OVERHEAT error, there’s two options:
- either replace the posistor with a good one
- or, cut the wires and solder a 306 ohm resistor to them (I didn’t try this, but I assume it would work :D)
Assuming you want to replace it: The posistor’s part # is F320121021240-IL, and Pioneer will sell you a new one for $19.25
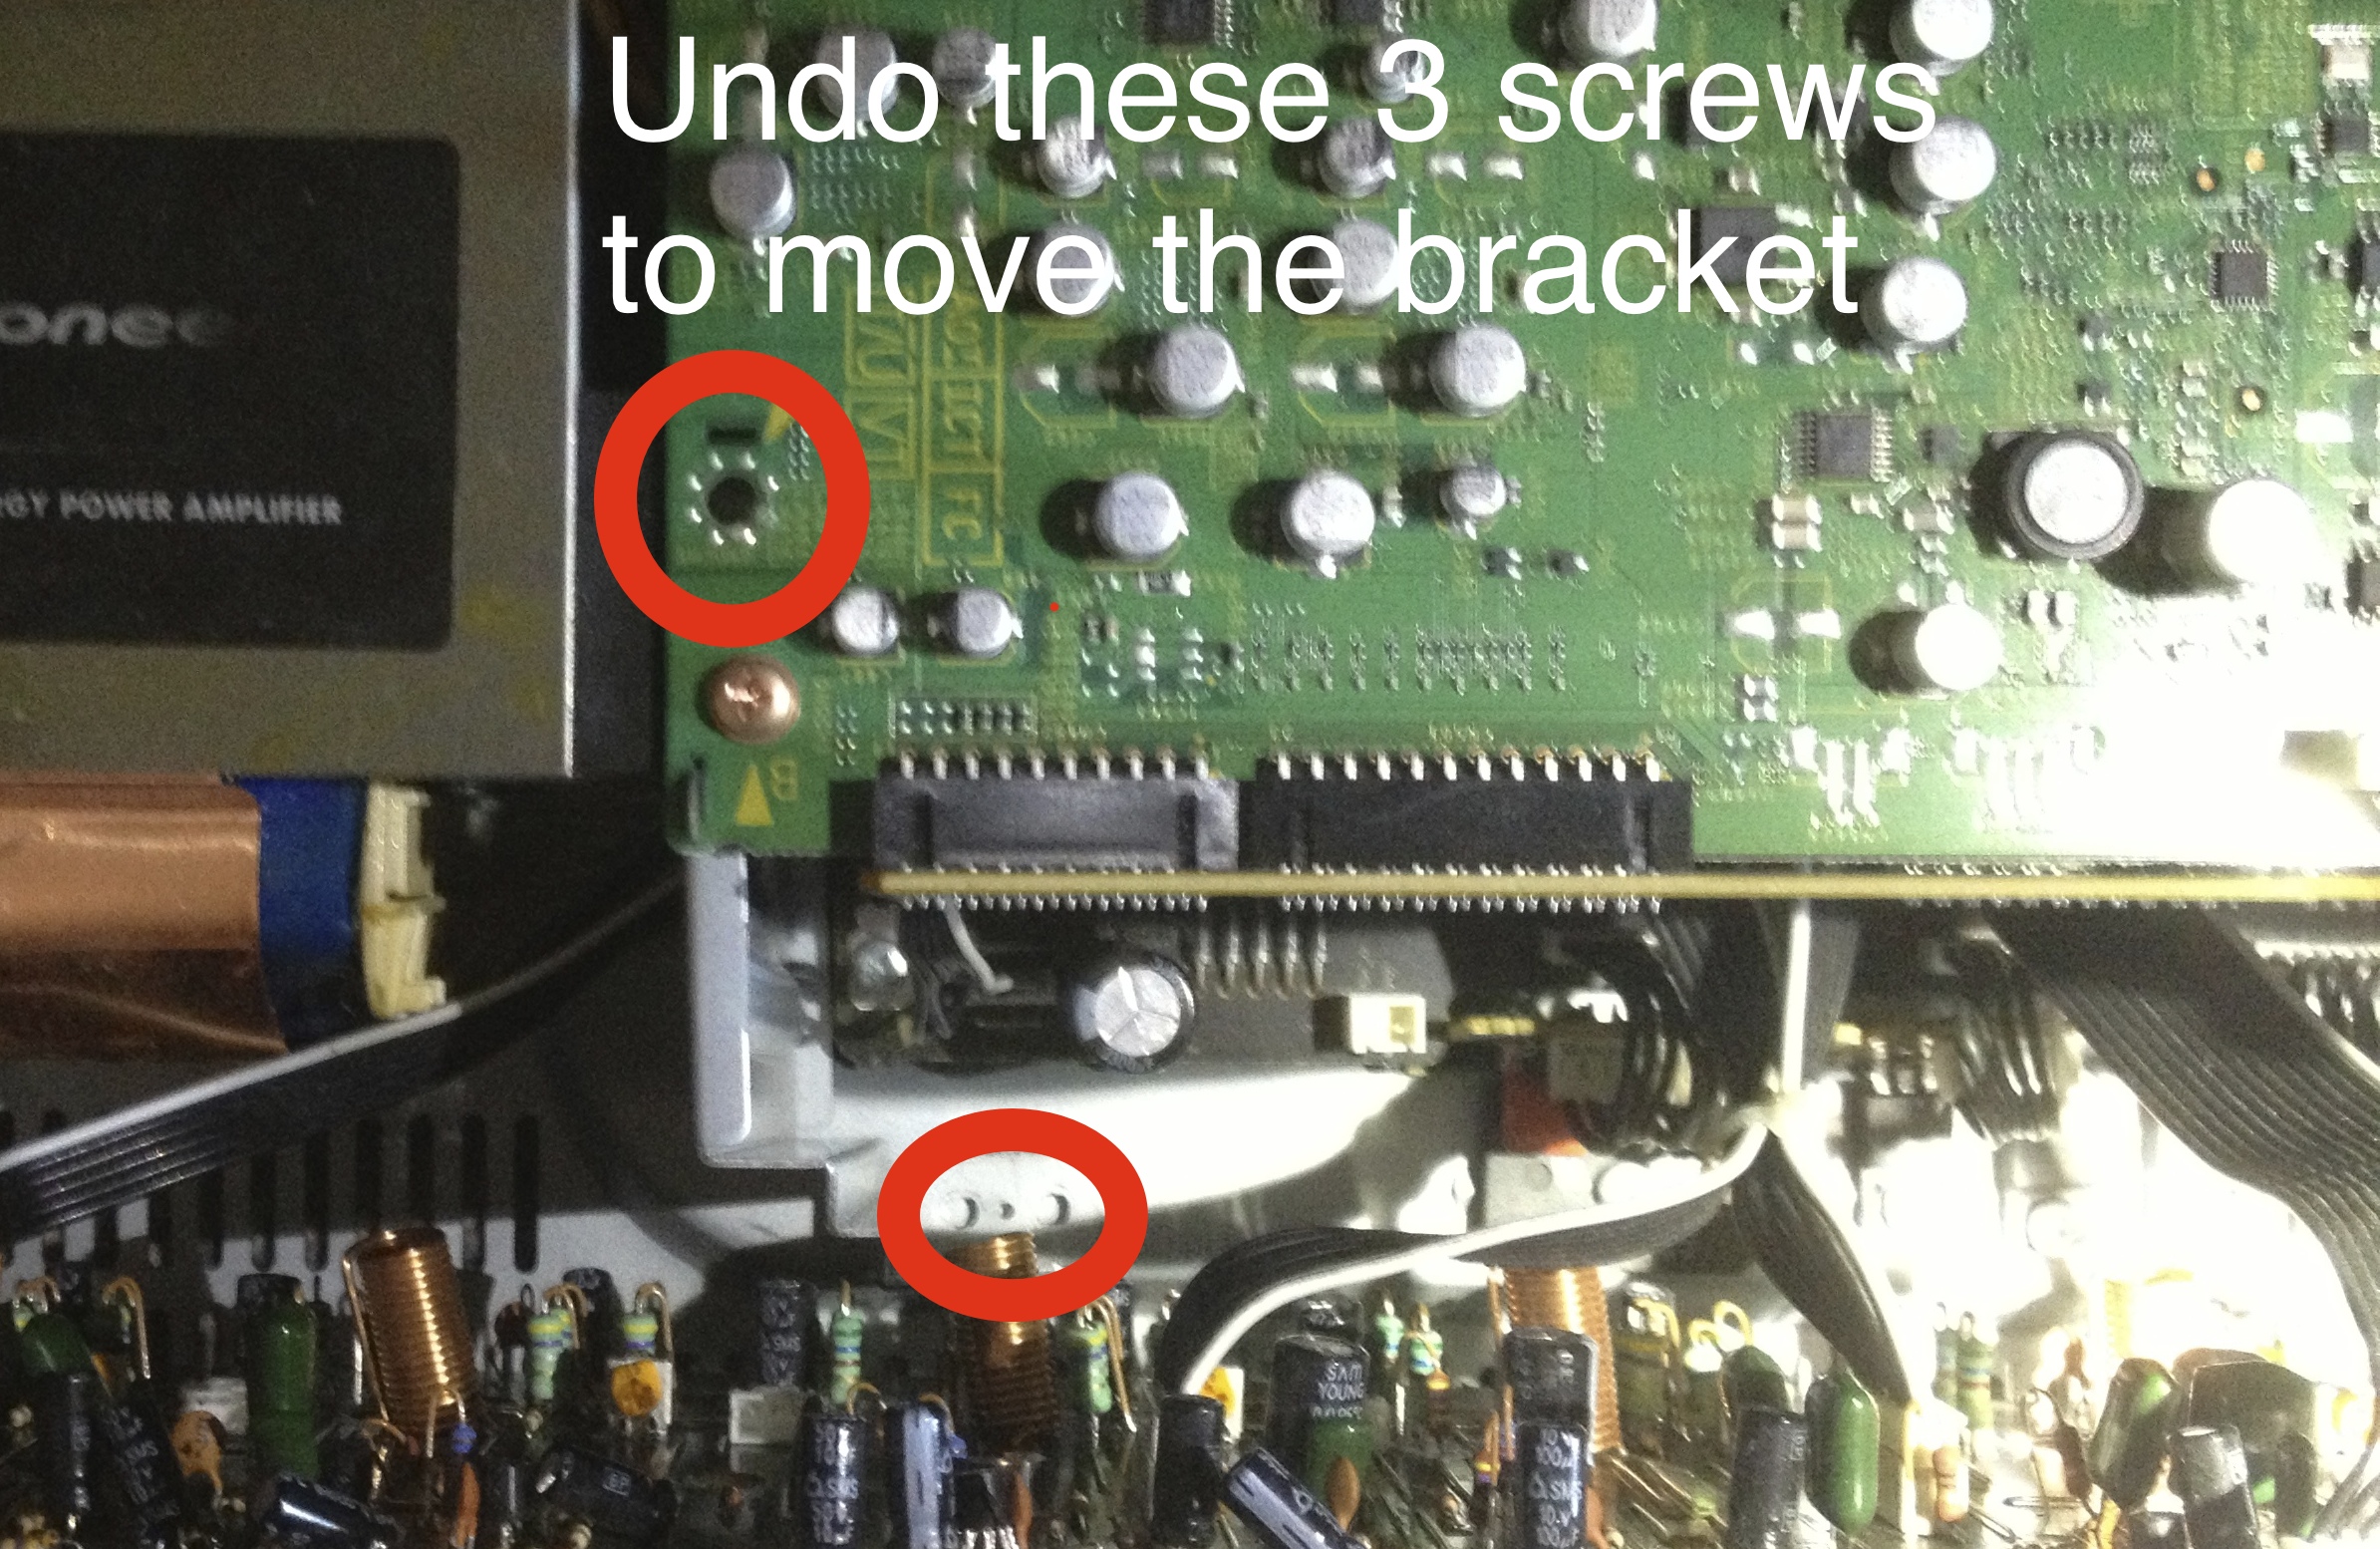
Removing the posistor without removing the amp board is tricky, you will need a right angle phillips bit/driver and don’t have much room to work with. There’s a hole in the amp board so you can unscrew the posistor, but there’s a bracket right behind the hole that makes it very hard to get a driver in! Luckily, by undoing 3 screws you can move the bracket back slightly. Again, be careful not to damage any components on the amp board!
I put my bit through the hole and onto the screw, and then had barely enough room to fit my right-angle ratchet loosely on the bit and loosen the screw.
I used needle-nose pliers to grab the screw once it was loose, since it could be hard to grab if it fell down. WIth the screw out, thread the wire and connector through the hole, and pull the posistor free.
Reverse the steps, and enjoy your working VSX-1020-K!
Subscribe via RSS